Nabatean/Roman and Byzantine period desert fortress east of lake Yeruham.
Home > Sites > Negev> Yeruham> Yeruham Fortress (Qasr Rekhmeh)
Contents:
Background
Location
History
Excavations
Photos
* Area B
* Area A
* Visit Video
* Park
Etymology
Links
Overview:
On the southeast side of Lake Yeruham are ruins of a Nabatean/Roman and Byzantine period desert fortress. It protected the road from Mamshit (Mampsis) to Avdat (Obada) – the Nabatean cities in the Negev along the Incense and Spice route. It began as a small station or tower during the height of the Nabatean trade empire (1st-2nd century AD). After the Roman annexation of the Nabatean Kingdom in 106 AD, the site expanded into a more formal military garrison or “caravanserai” (inn for travelers). The site’s most extensive phase was during the Byzantine period (5th-8th century AD) when it evolved into a rural settlement with a strong military character, featuring streets, residential buildings, and a fortified tower.
Location and Map:
This vast site, with remains of the Roman/Byzantine period, is located 600m southeast of the Yeruham Lake park. The ancient buildings were built on a shallow hill at a height of 468m, about ~10m above the lake area. of Avdat (Oboda) and Mamshit (Mampsis).
-
It overlooks the plains to the north, east, and south, providing a clear vantage point for local security.
Excavation areas are marked on the map and are detailed in this web page.

History:
The area of Yeruham is located on the side of ancient routes passing thru the Great Crater. Therefore, many ancient sites can be found in this area, starting from the stone age and spanning all periods until the modern times.
-
Intermediate Bronze, Middle Bronze I (2400-2000 B.C.)
This period is detailed on a separate web page – Har Yeruham – located on the mountain above the lake.
- Early Roman period (1st century – 106 AD)
On the southeast side of Lake Yeruham was one of the stations along the Nabatean trade route – known as the Incense & Spice route. This route connected the east (Yemen and Oman), through Arabia, via the Nabatean capital city Petra, to the port cities on the shore of the Mediterranean Sea – Gaza, Raphia, Rhinocorura (al Arish). The road was used by the Nabateans to export the incense and spices from southern Arabia and the Far east to the Classic world of Greece and Rome. In order to support & protect the Incense route, the Nabateans established stations and fortresses along the road.
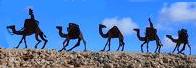
Caravans of camels carrying the merchandise along the Incense route
During the Early Roman period this was a Nabatean station along the Incense & Spice route. The site sits roughly two-thirds of the way between the major Nabatean cities Avdat (Oboda) and Mamshit (Mampsis). The fortress was originally established as a fortified tower and included stables. It functioned as a praesidium (military post) to defend the ancient trade route between Avdat and Mamshit, which was part of the Incense and Spice route used by Nabataeans and later the Romans. Findings from this era showed the site’s origins as a fortified tower accompanied by stables.
According to the excavator of the site, Rudolph Cohen, the site was established during the period of the Nabatean King Aretas (Haritat) IV Philopatris, who ruled 9BC to 40 AD. It was enlarged to a Nabatean settlement, especially under Nabatean King Rabbel II Soter (70-106 AD). At the end of his reign (106 AD) the Nabatean Kingdom was annexed by the Romans. This resulted in a freeze of settlement in the station, that continued for 200 years.
- Late Roman period (4th century AD), Byzantine period (5th-7th century AD)
The site expanded significantly during this time. Residential houses and additional buildings were added, transforming the military post into a small town or a complex caravanserai for travelers.Excavators uncovered an extensive town-like expansion, including residential houses, paved streets, and a surrounding wall.
The central area in the center (Area B) specifically revealed large building complexes with walls reaching heights of up to 3 meters and thicknesses of 1.2 meters. Some units featured central courtyards designed for communal access.
- Modern period
In 1951 a town was established near the Great Crater, initially housing the workers in the crater and immigrants. It was named after Tel Yeruham, which is adjacent to the town.
Excavations:
Excavations at the site have uncovered a variety of structures and artifacts that illustrate its long history of occupation:
- Architecture: Remains include a fortified tower, a surrounding wall, paved streets, and various residential units, some of which feature central courtyards for communal use.
- Artifacts: Significant finds include pottery shards and ostraca (pottery pieces used for writing) bearing Greek inscriptions.
- Water Sources: Two nearby wells served the fort. Be’er Yeruham (Yeruham Well) and ancient Be’er Hagar (Hagar’s Well) provided the necessary water for the inhabitants and their animals in the arid desert environment.
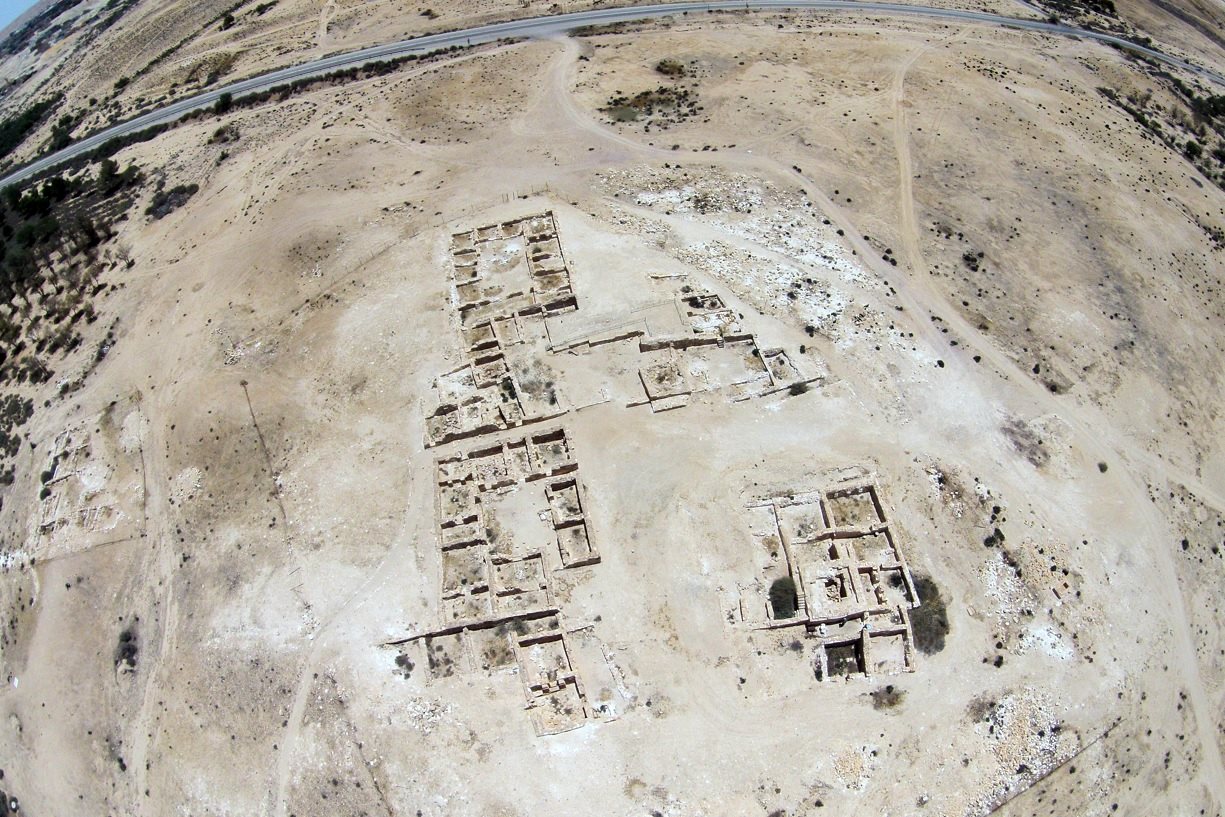
The site was excavated between 1966 and 1967 by Rudolph Cohen on behalf of the Israel Department of Antiquities and Museums. The work was concentrated in four primary areas, labeled A through D. Renewed excavations by Rudolph Cohen (1993) and Y. Baumgrten (2000) added area B2 on the west side of area B.
These were the excavation areas:
- Area A: Northern part of the area. A structure with four or five residential units with common courtyard.
- Area B: On a hill in the center of the area, overlooking the entire site, with 6 buildings (I-VI). Each building a central courtyard diving the building into 2-4 wings. A watch tower and a stable stood in building VI since the Early Roman period.
- Area C: Southern part. Several buildings from different architectural phases from the Early/late Roman to the Byzantine period, incluging a stable.
- Area D: Western part of the area.
The archaeologists identified three distinct levels (strata) of occupation: (1) Nabatean/Early Roman, (2) Late Roman/Byzantine (possibly up to the earthquake of 363 AD), and (3) Byzantine (5th to 7th century AD). All the areas are of the Byzantine period, but some Early and Late Roman period structures were found below the areas B & C.
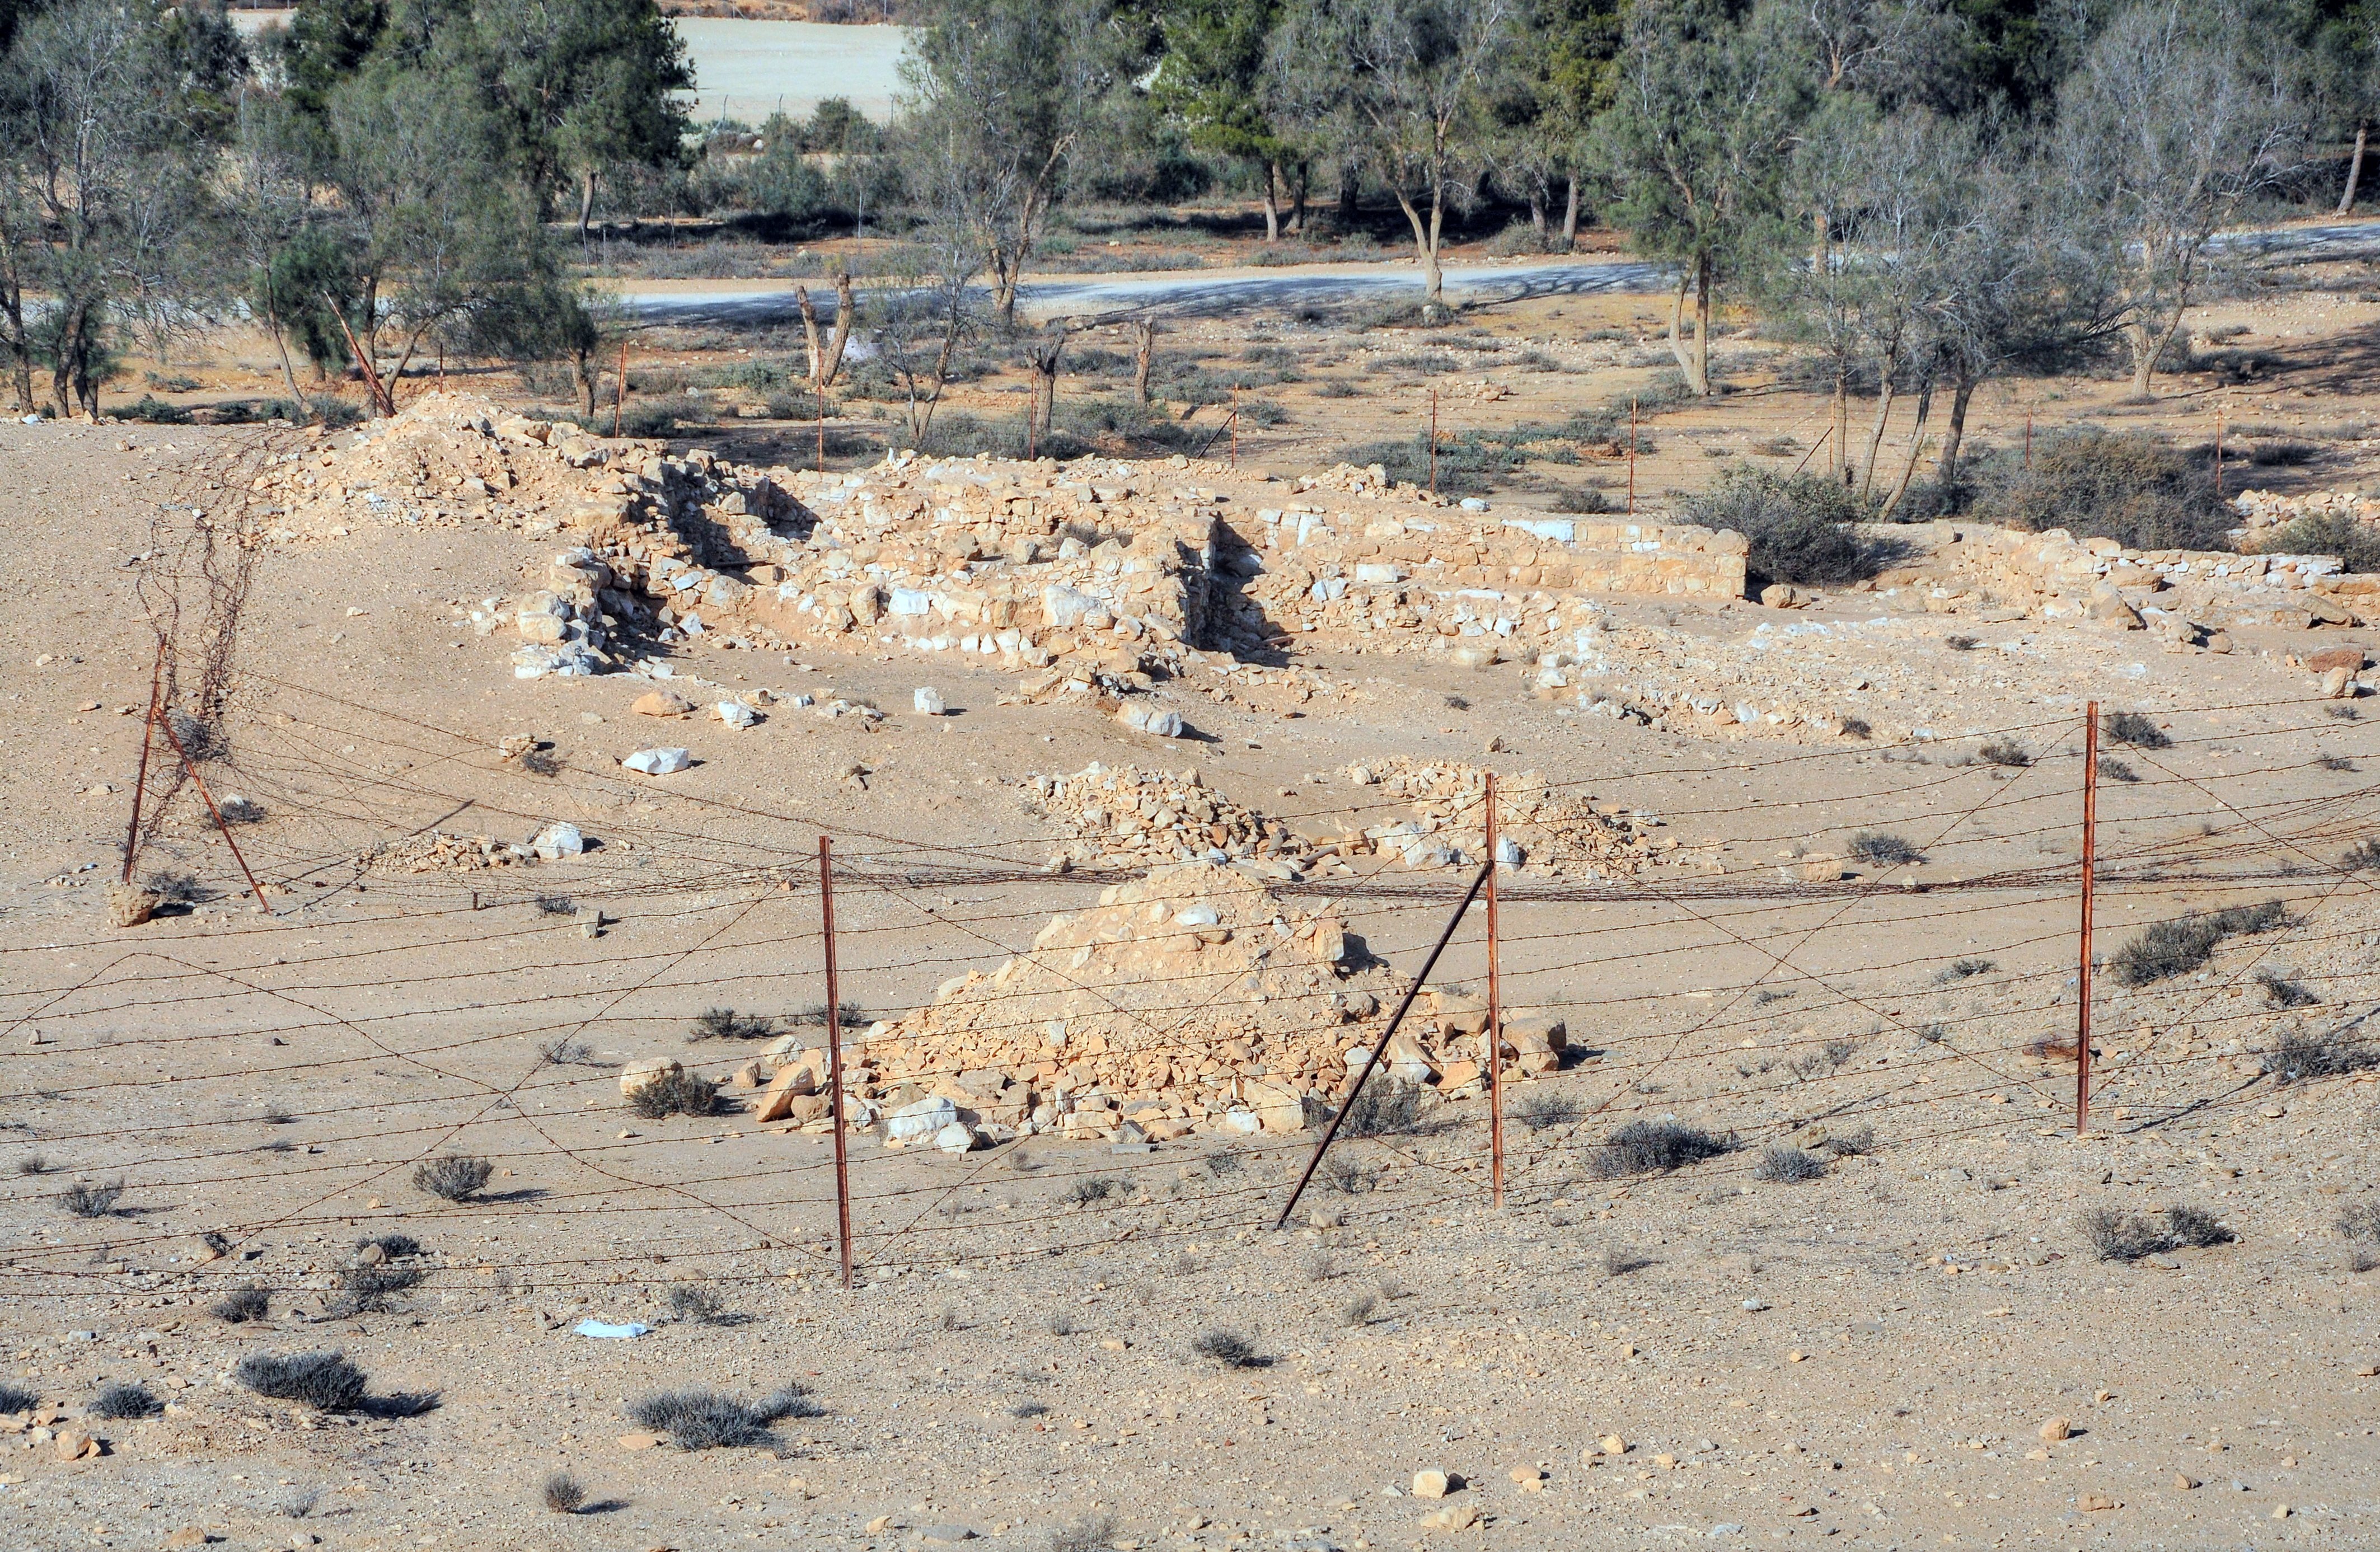
Photos:
Most photos were captured in 2016. A new visit, with video recording, was on February 2026 on area B.
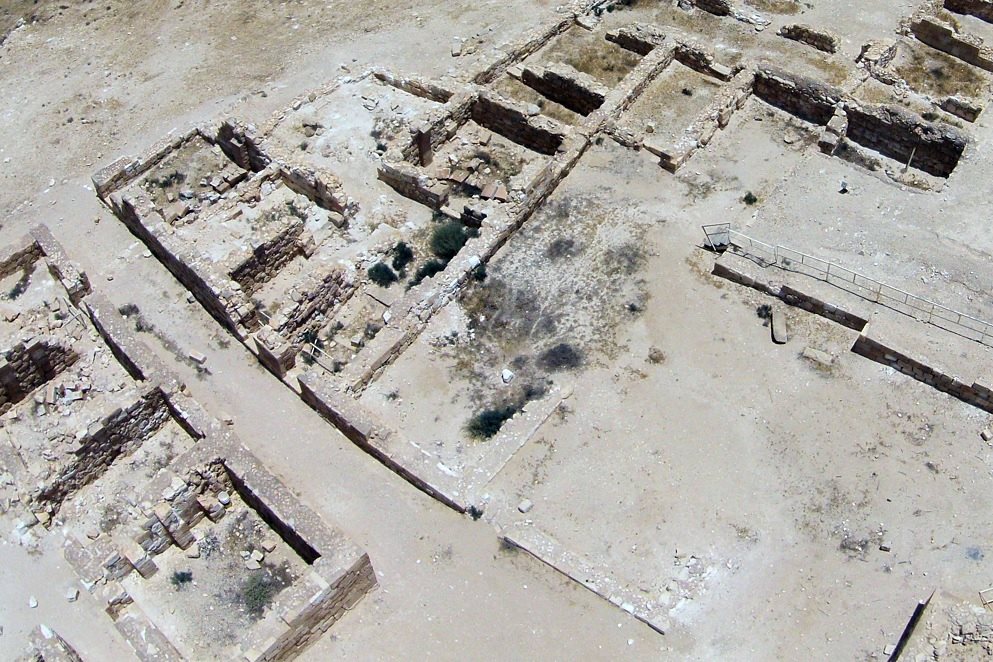
(a) Area B
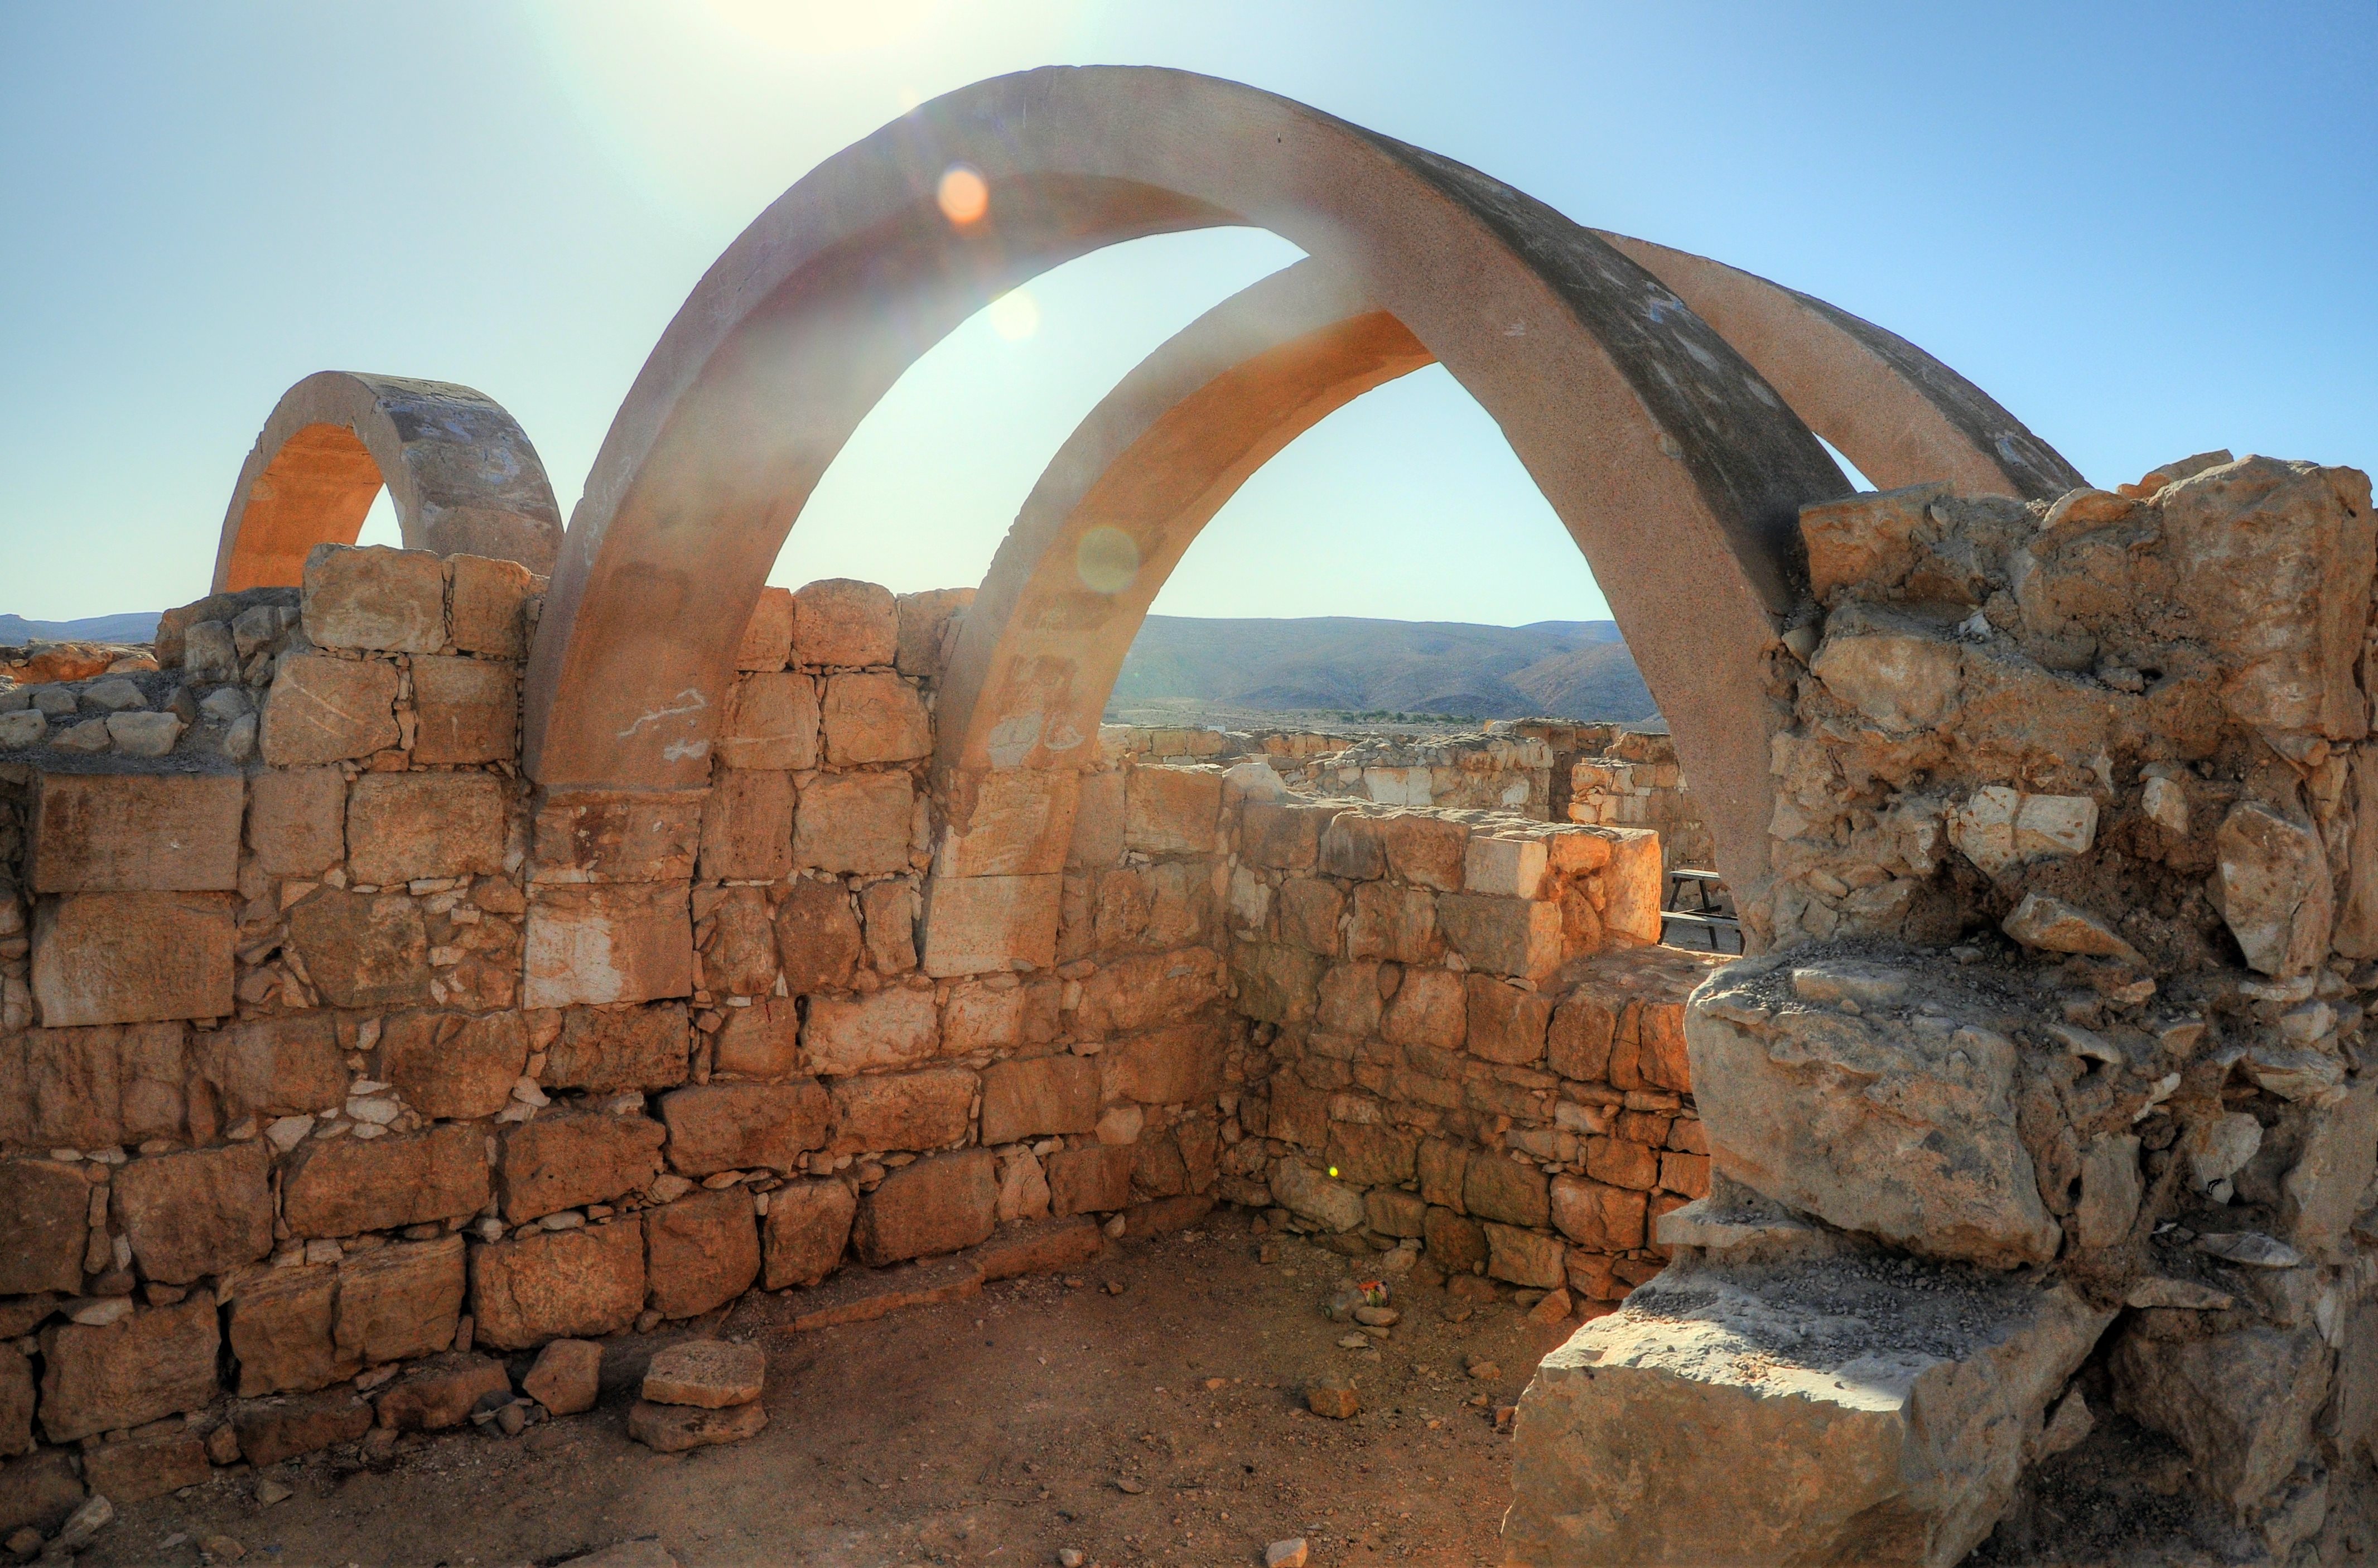
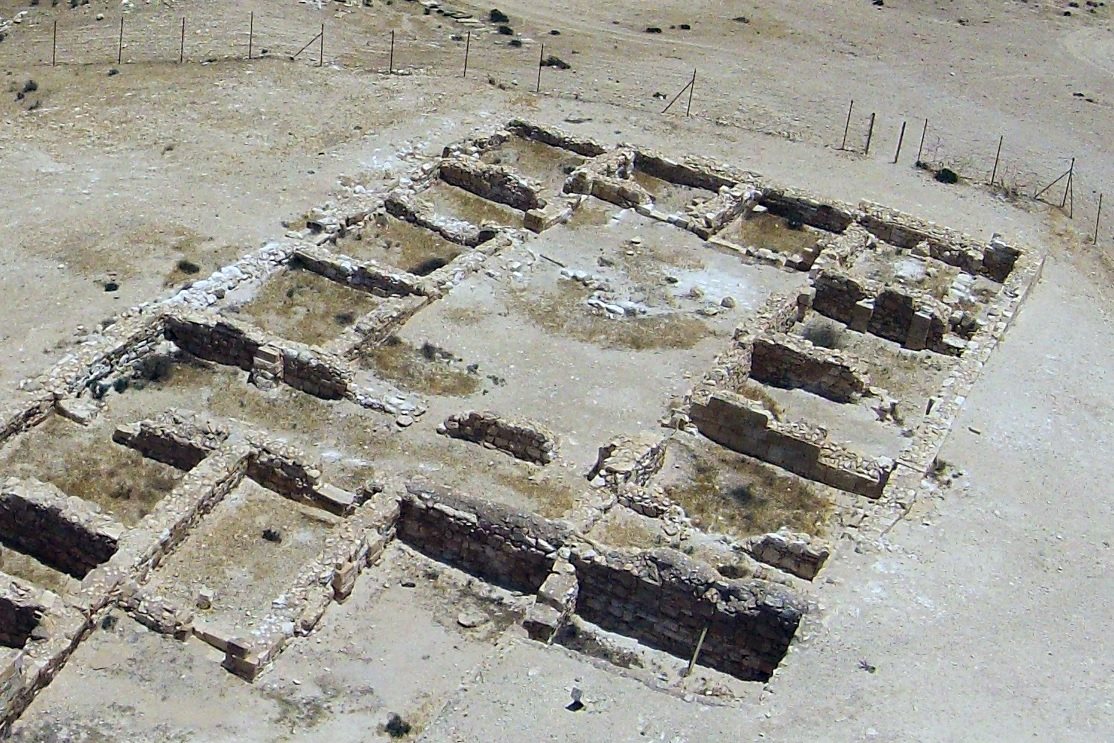
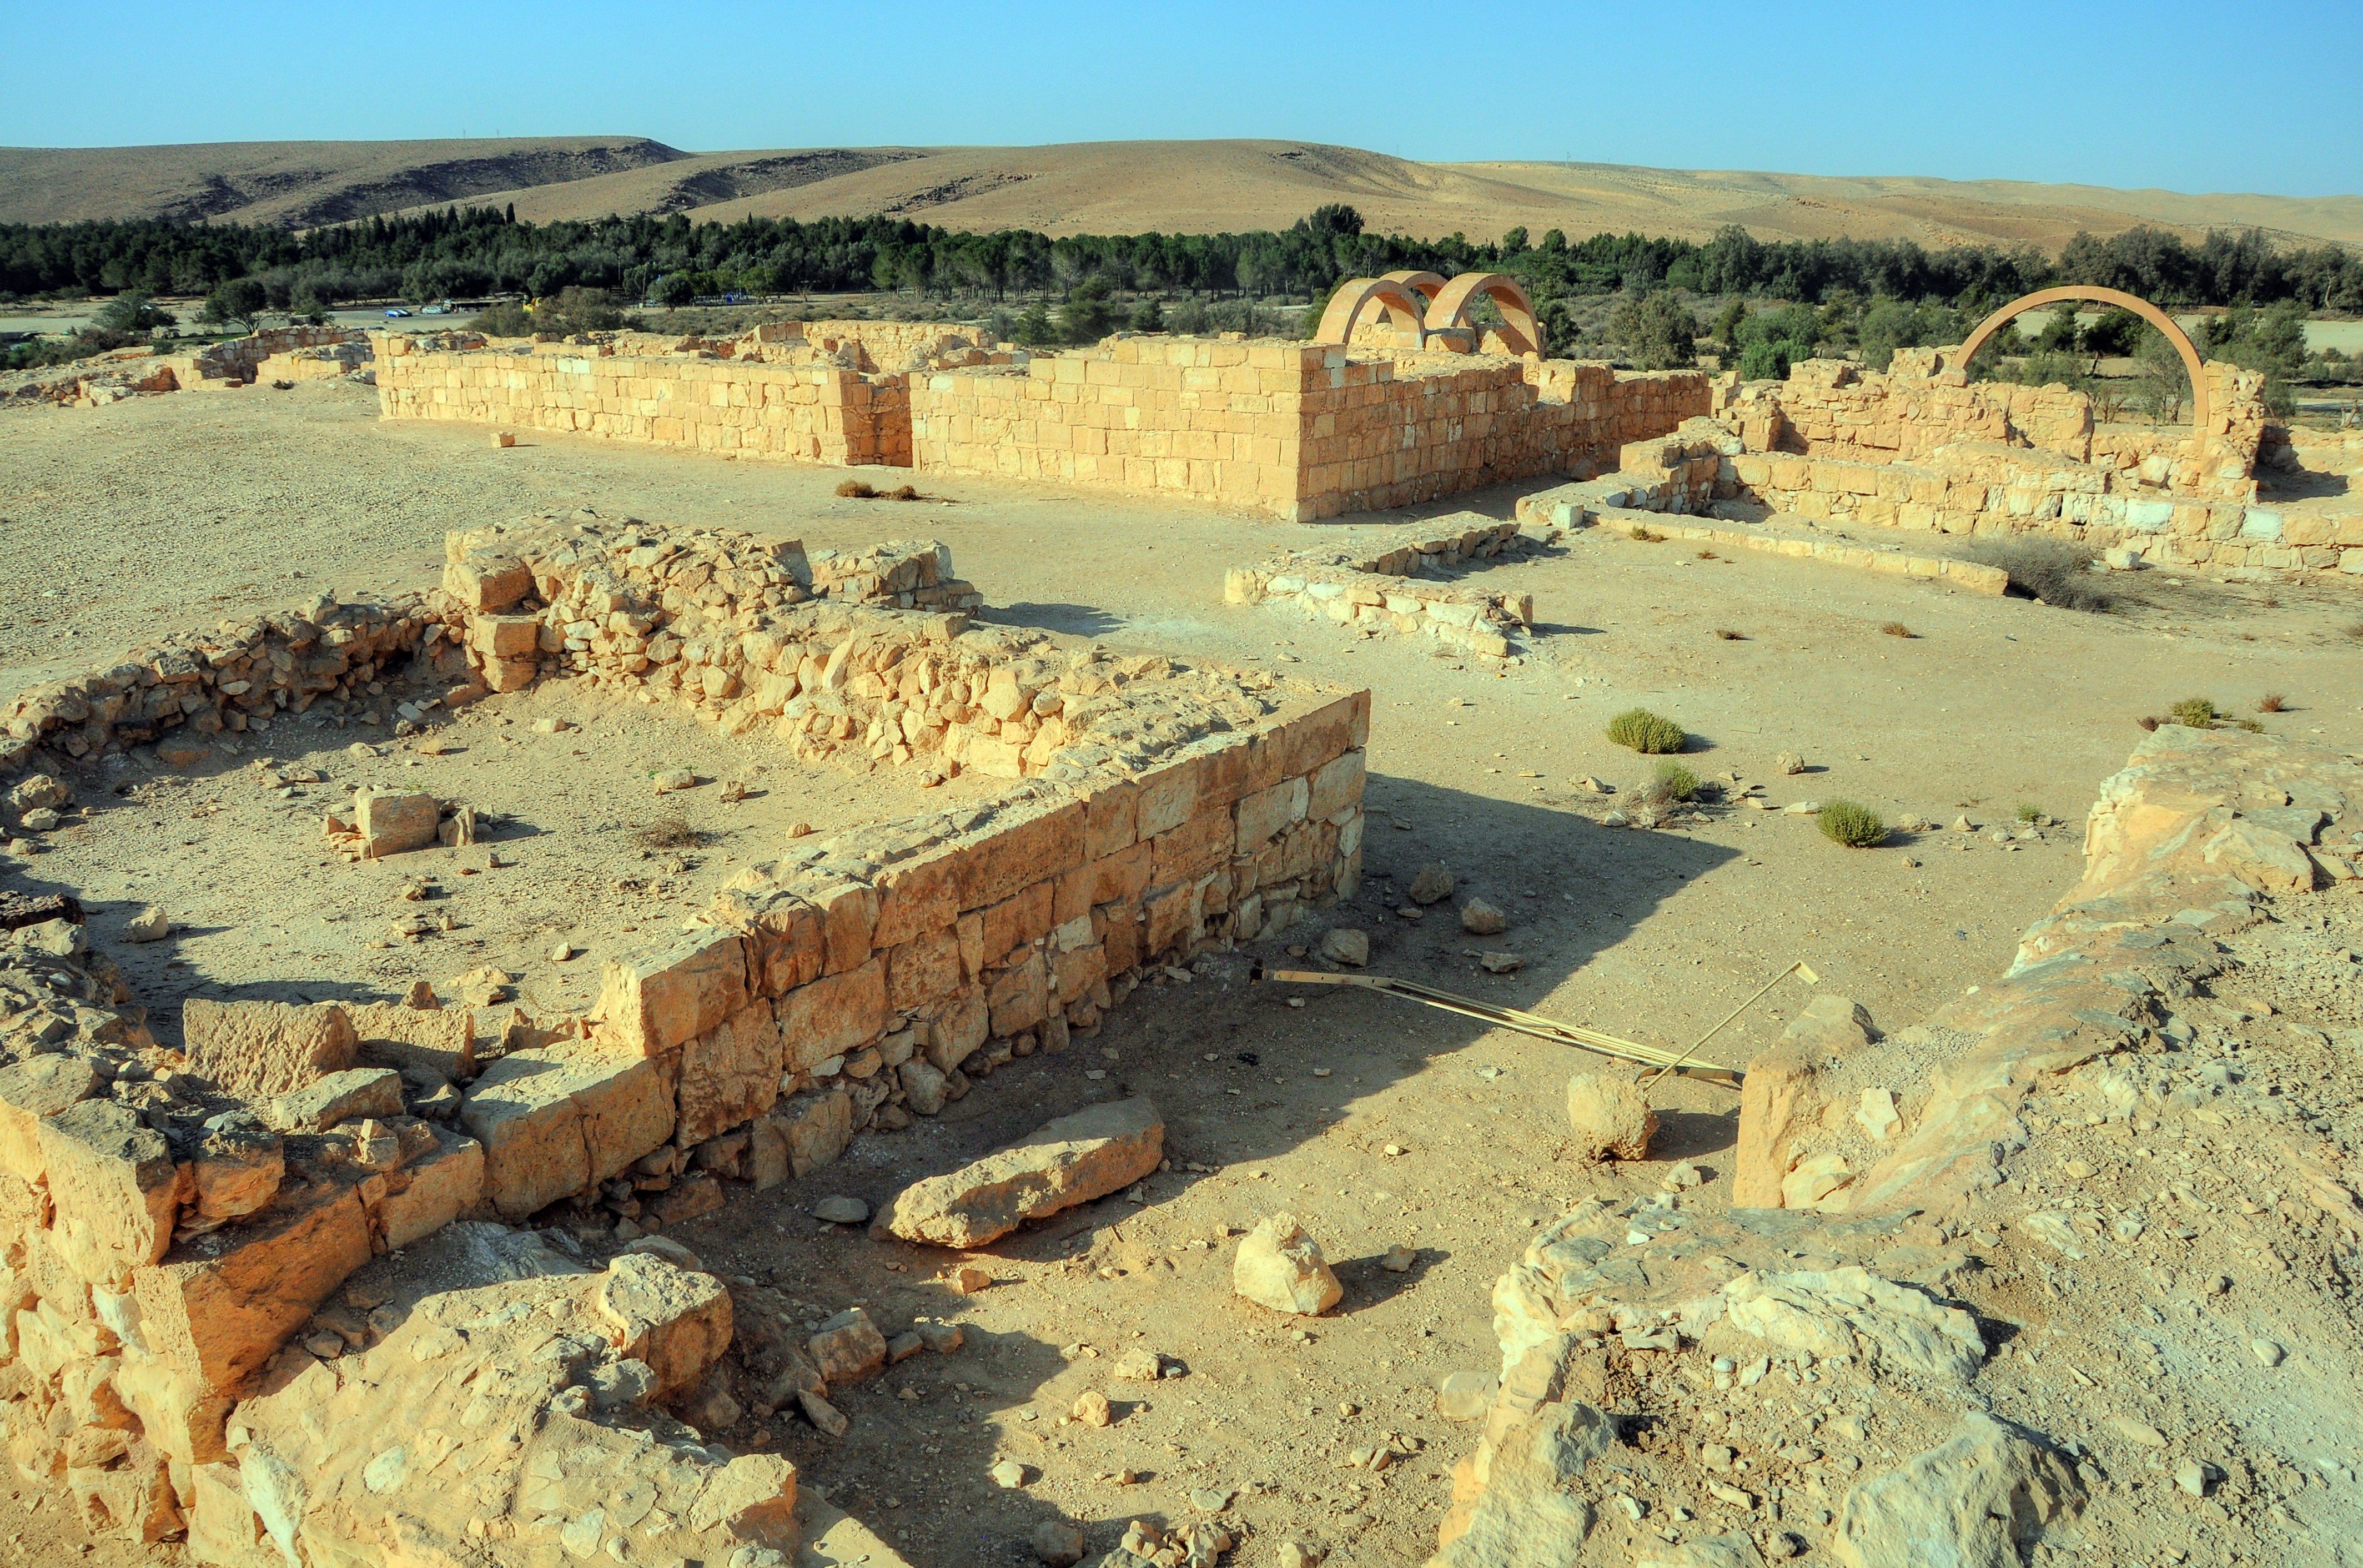
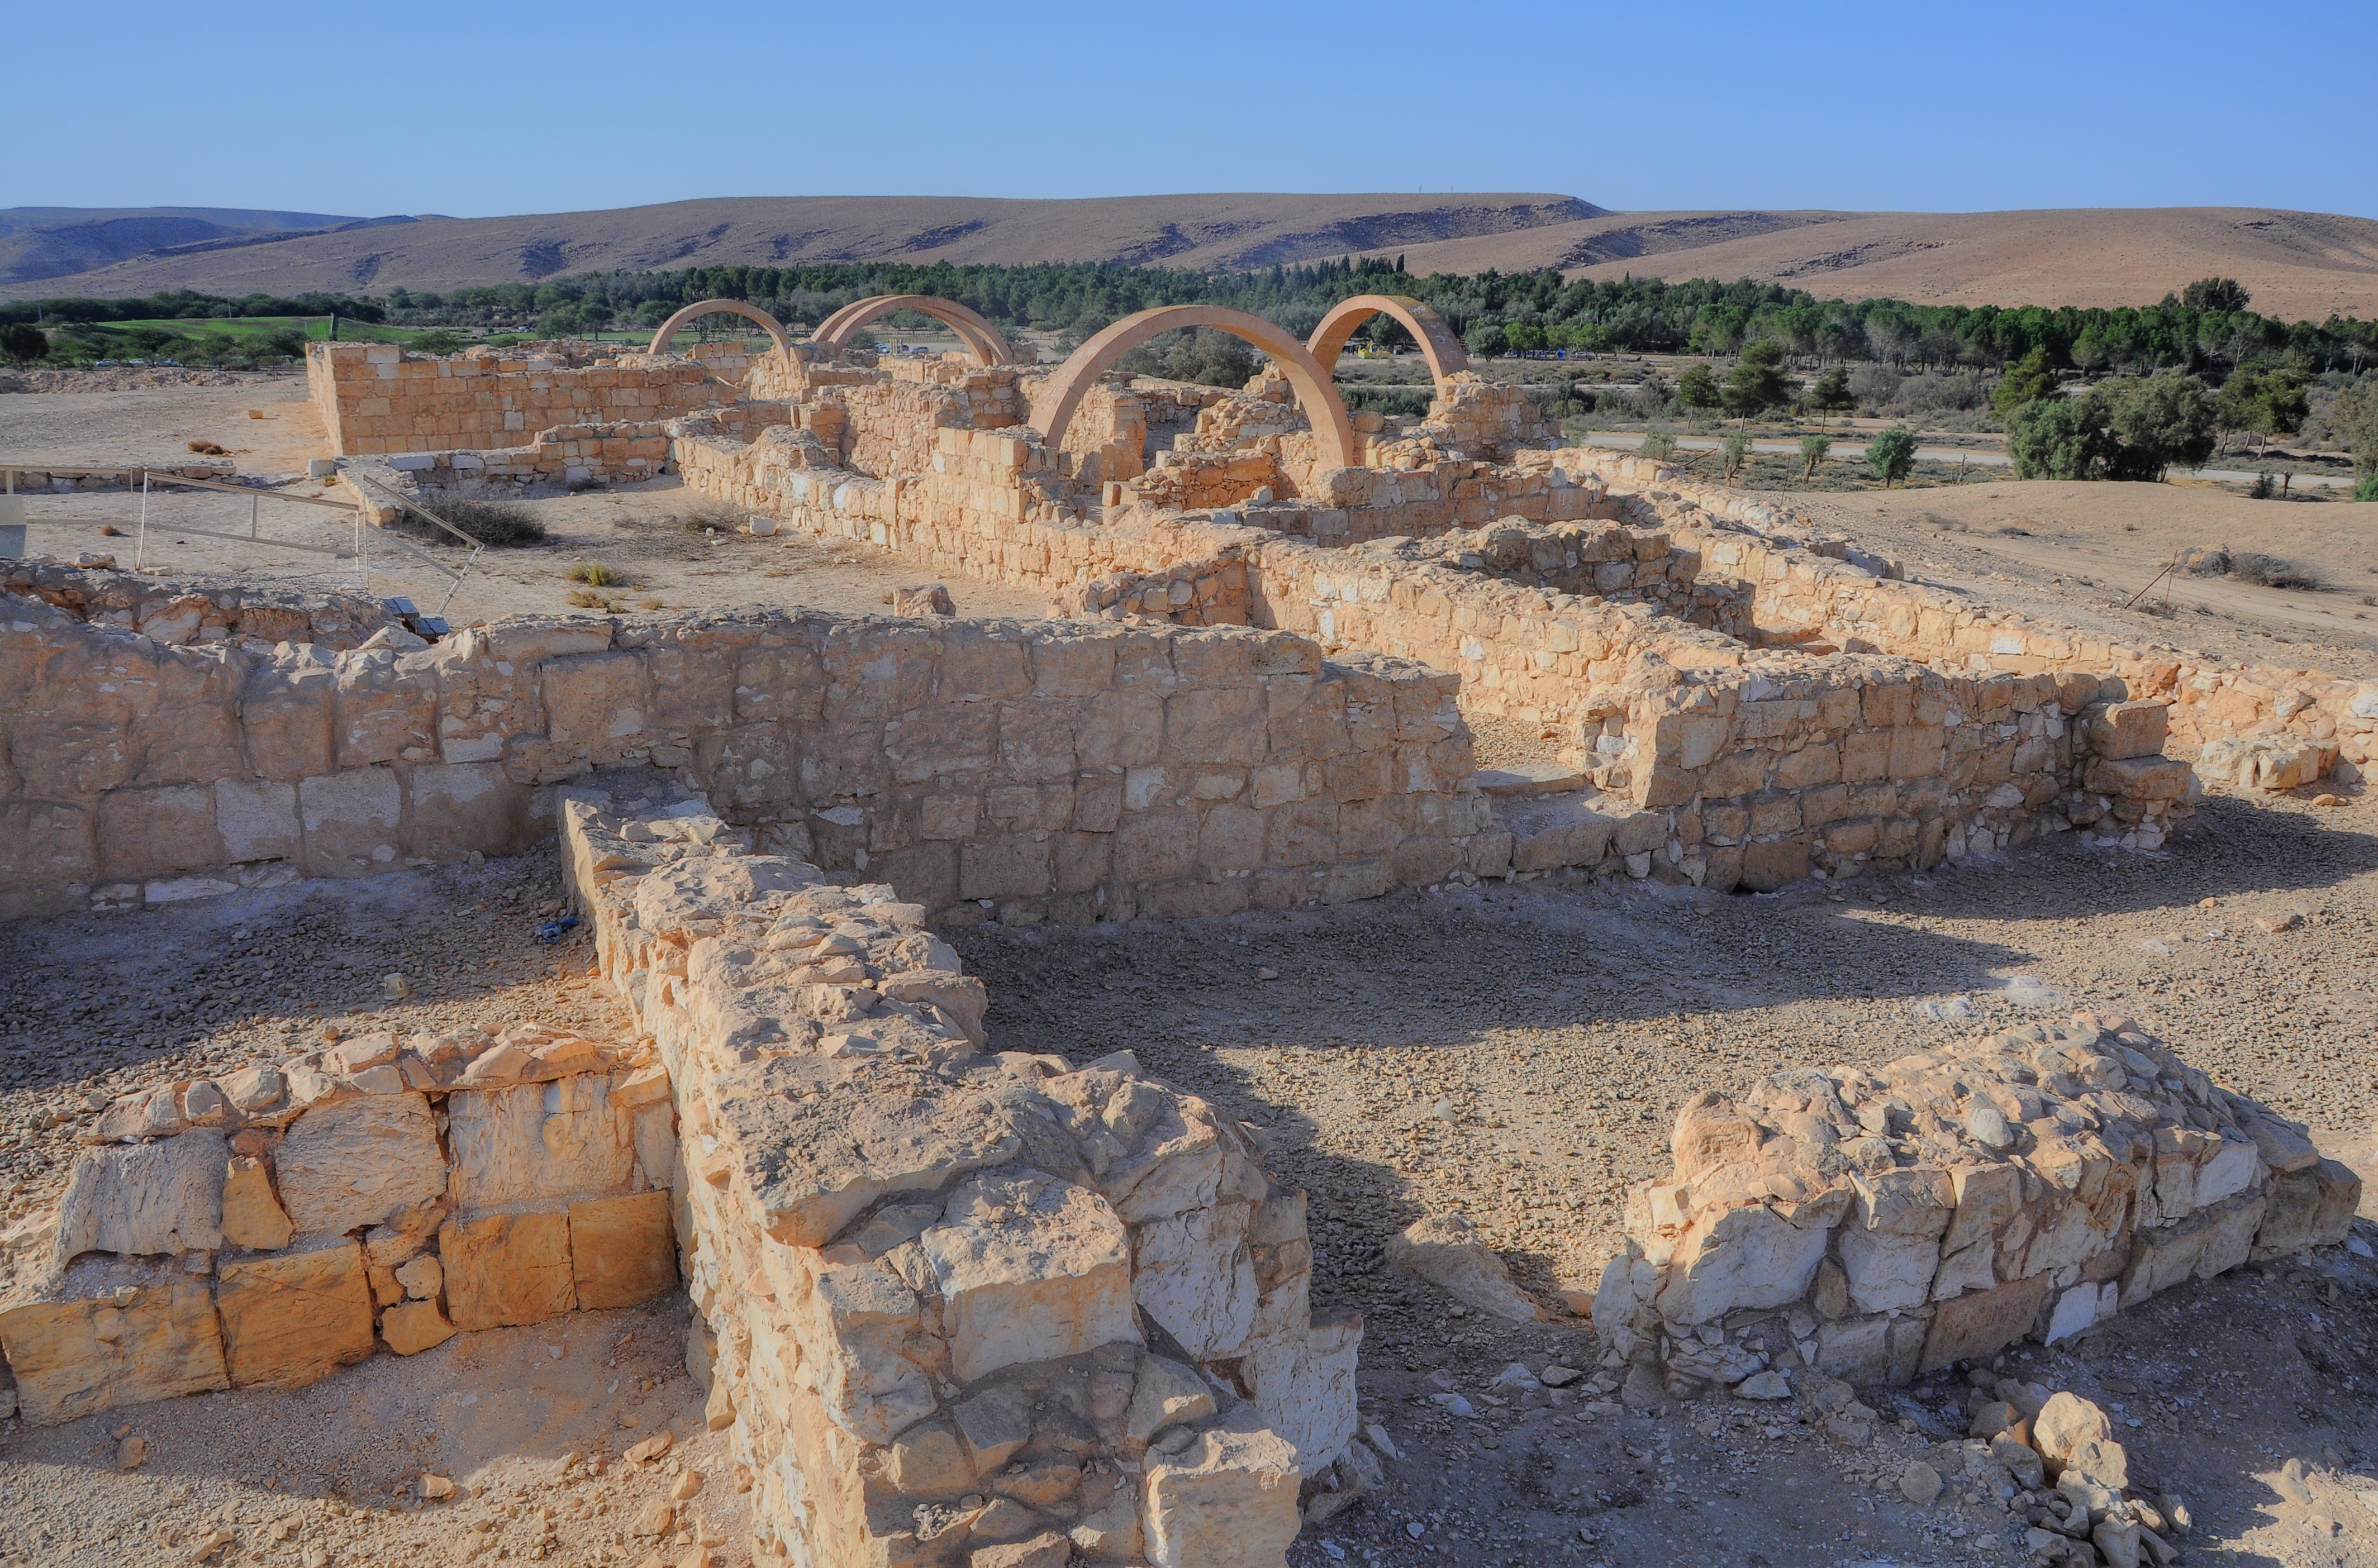
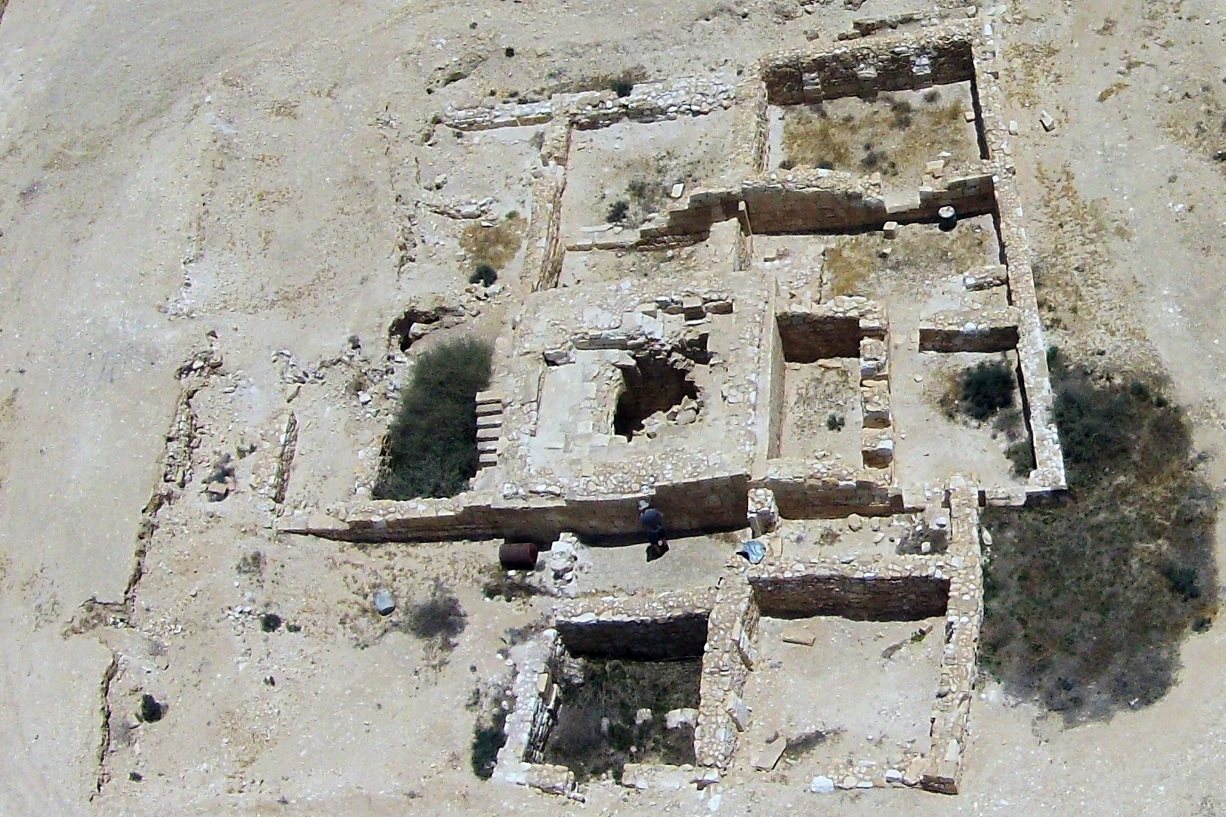
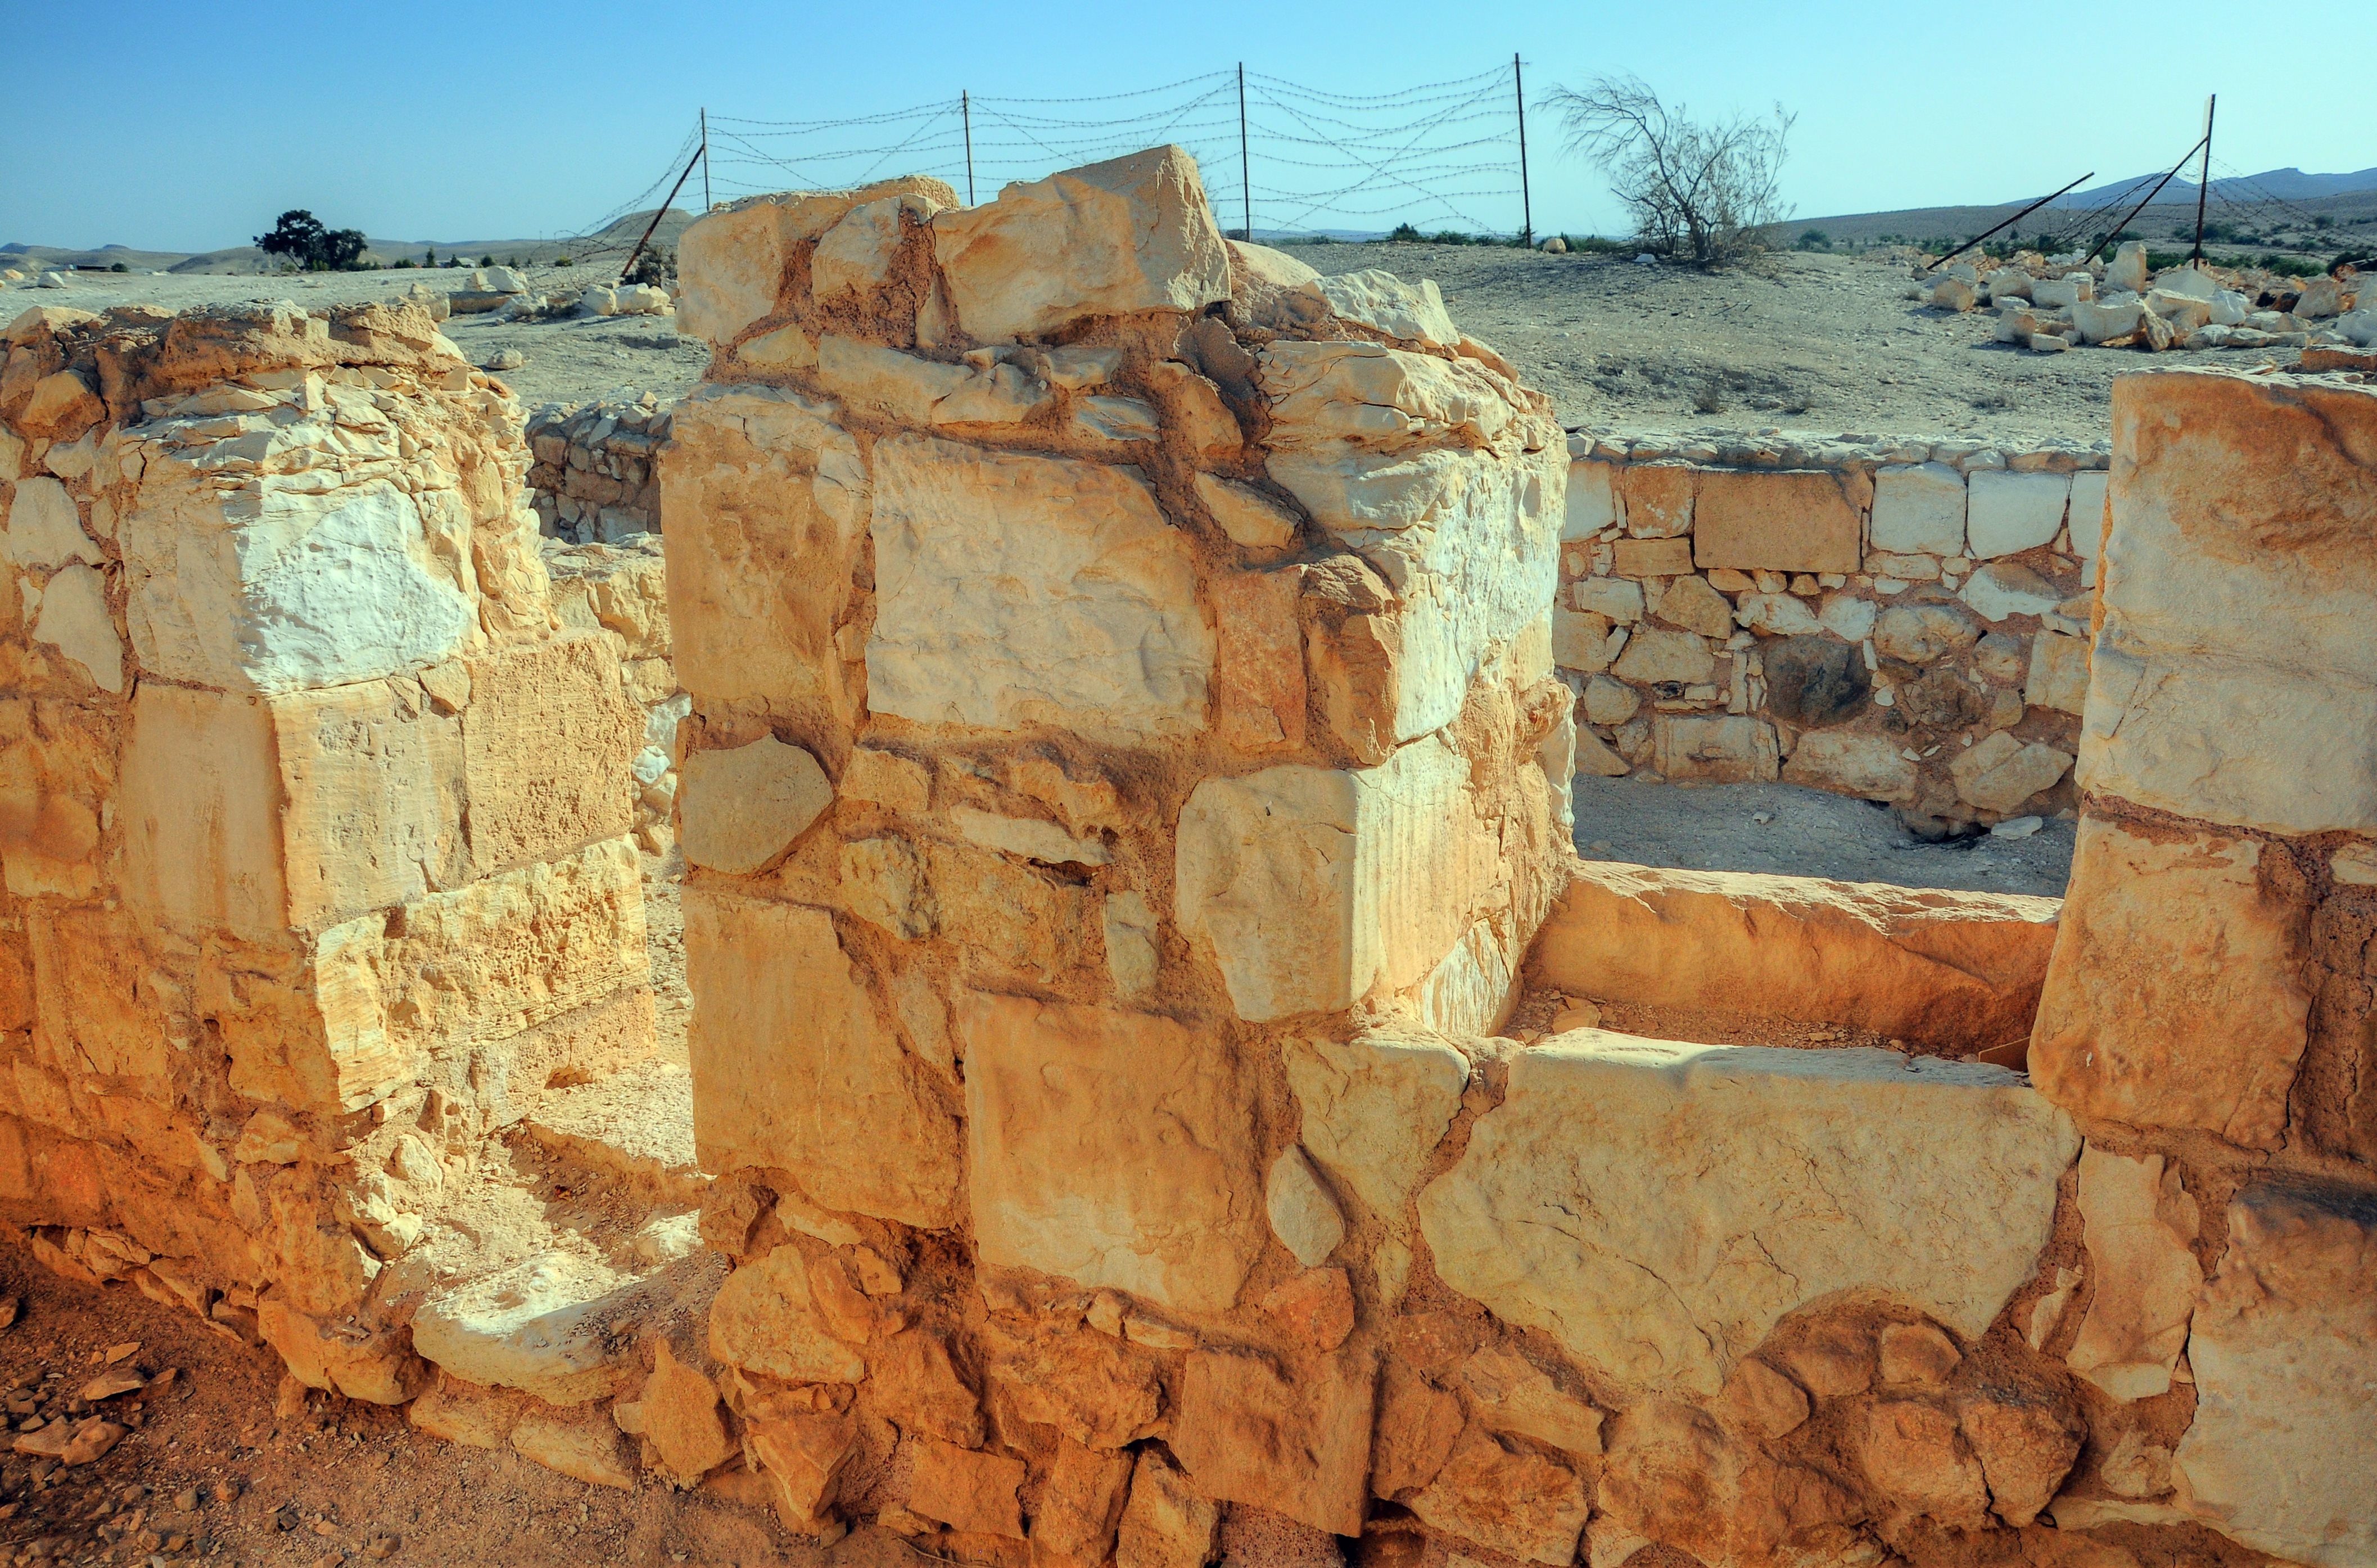
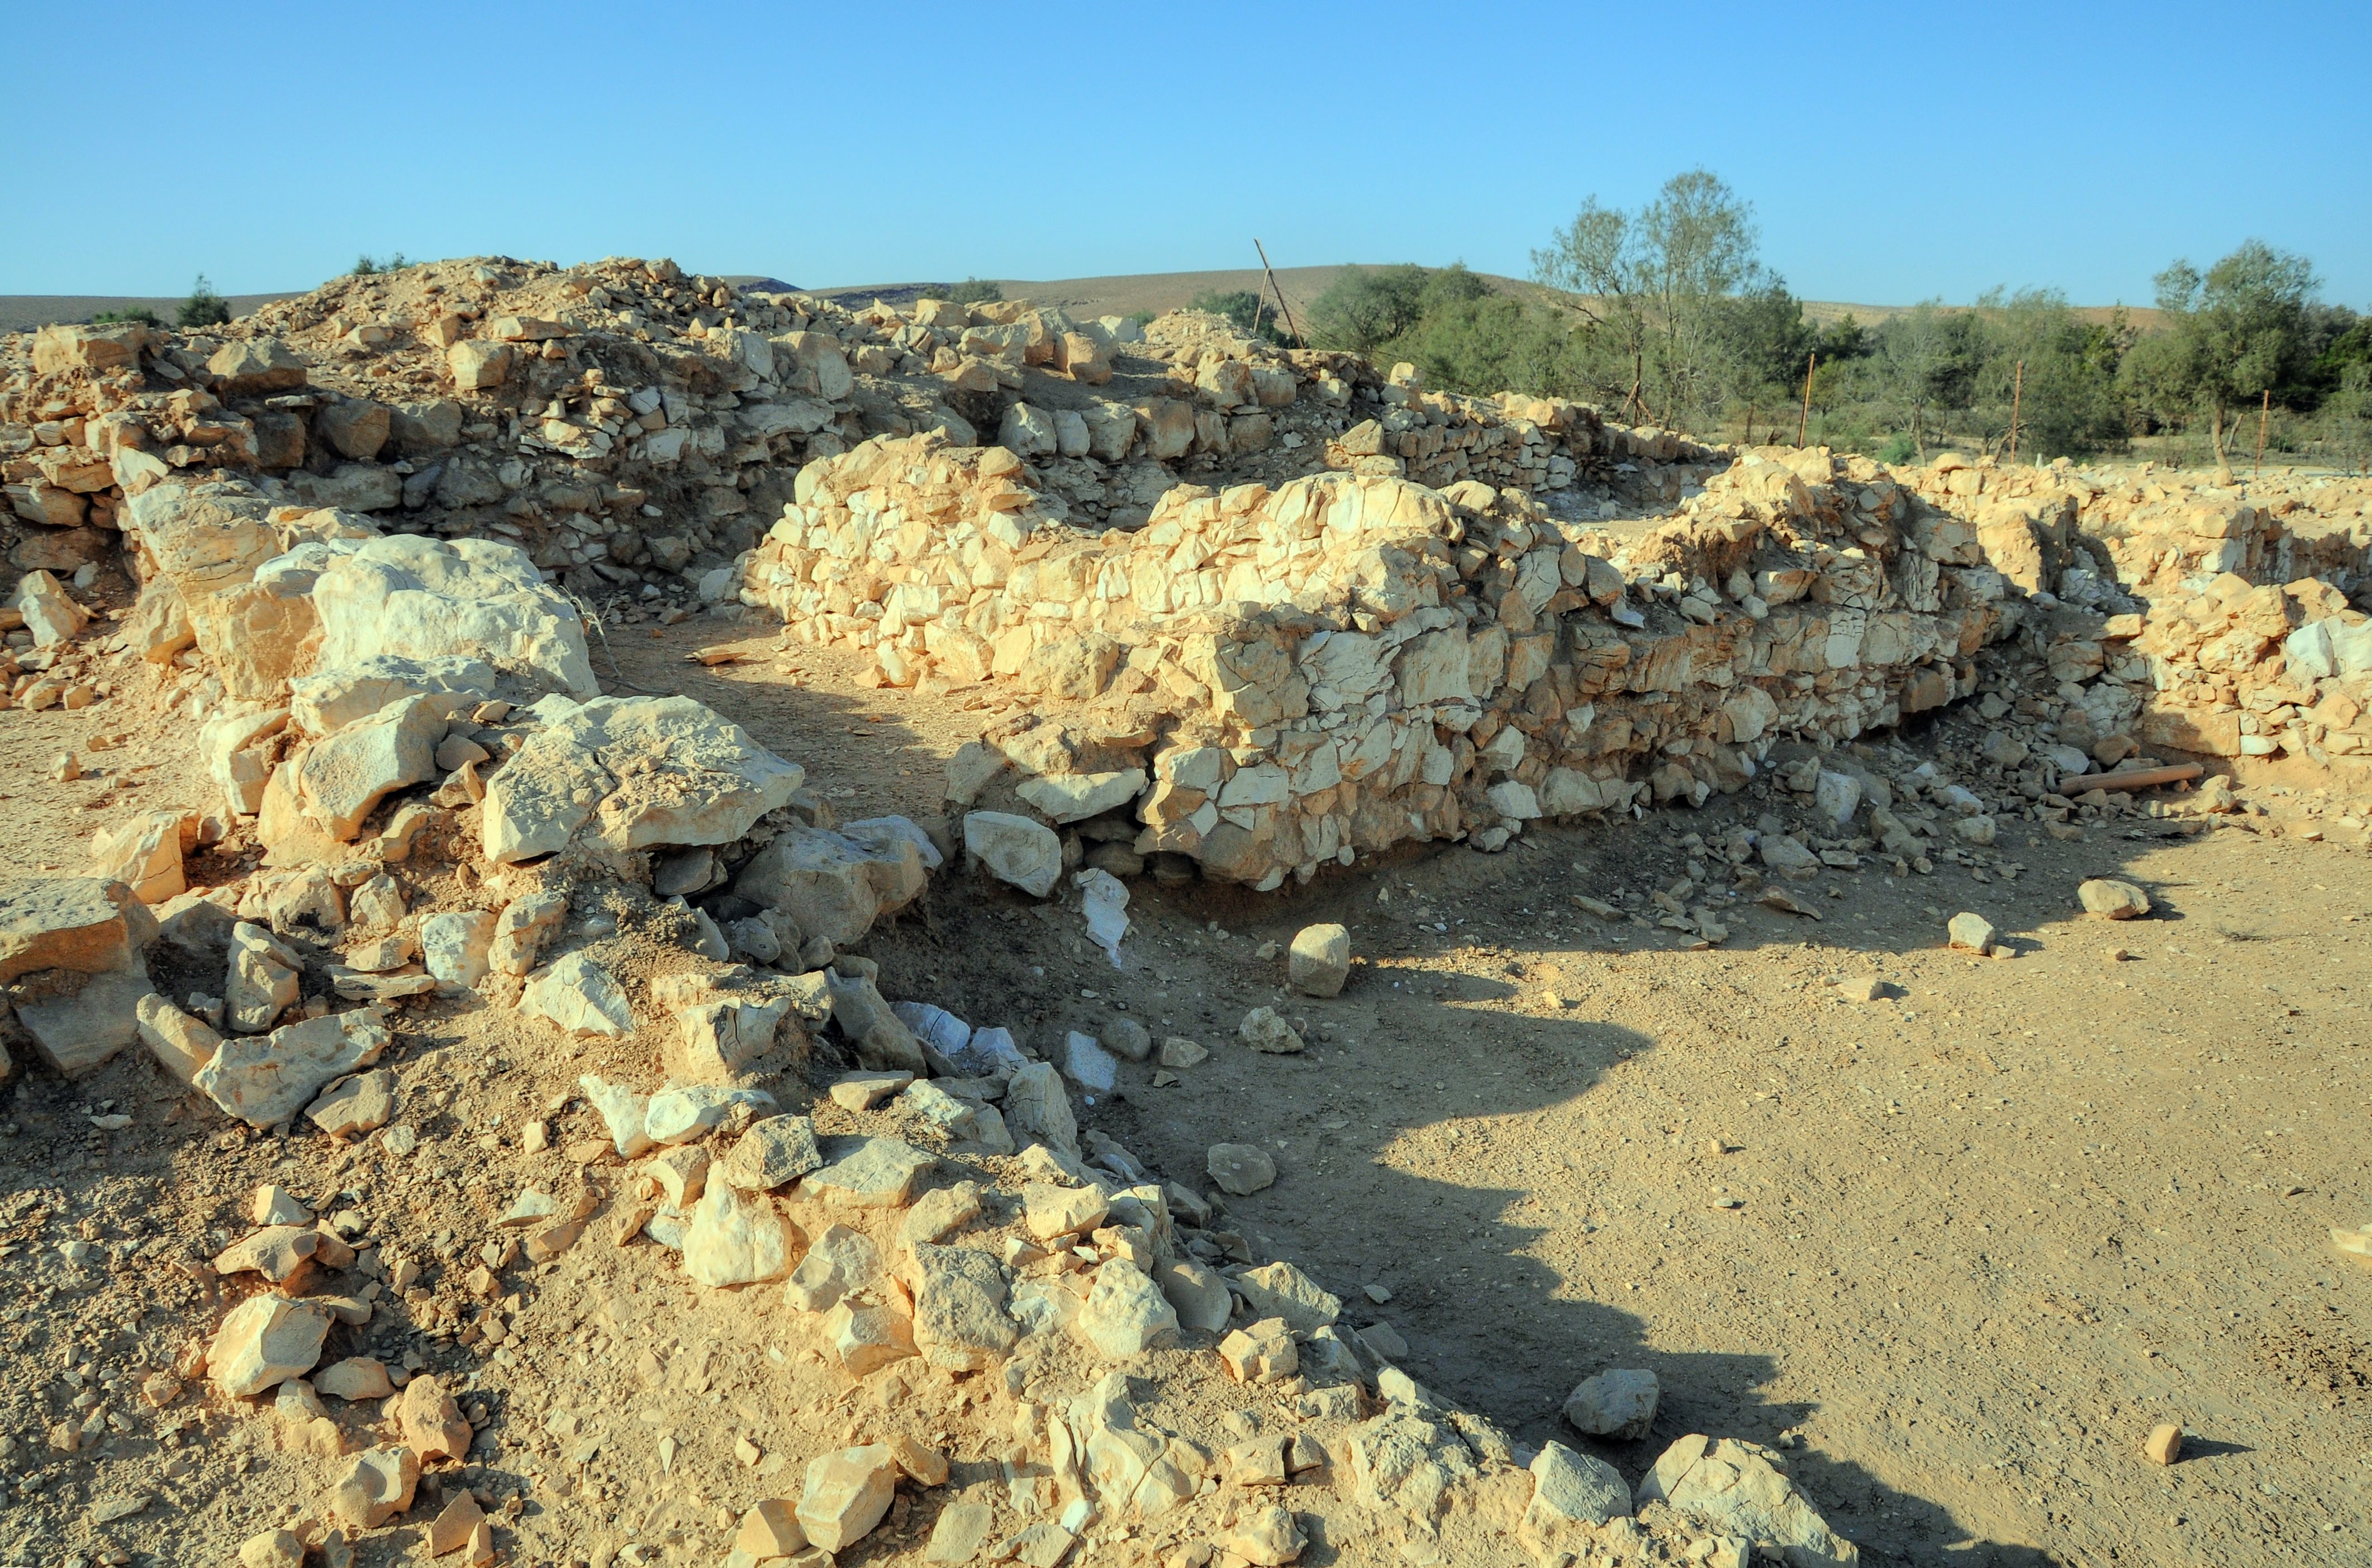
The main complex of the Roman/Byzantine period buildings is designated as Area B. They are built on a shalow hill in the center of the area, and overlooking the entire site. There are 6 buildings, numbered I-VI. Each such building has a central courtyard that divides the building into 2-4 wings. Their areas are between 320 and 950 square meters. The walls of the buildings were preserved in some places to a height of approximately 3 meters. They were constructed with dressed stones, laid in leveled courses of uniform height using fieldstones and mortar. In contrast, well-hewn ashlar stones were used for the building entrances, the doorways between rooms, and the engaged pilasters within the vaulted walls. Most of the rooms were roofed by arches supported by two or three pairs of engaged pilasters. The floors were made of beaten earth.
A number of lintels adorned with crosses found in three buildings indicate that the settlement population was Christian during the Byzantine period.
An aerial view is shown below, oriented towards the east. The name of the buildings is added on the photo. Note that the naming of the buildings has slightly changed from the original excavations, and now the order is clockwise starting from the north west building.
Click on the photos to view in higher resolution…
Each of these buildings are described below.
- Building I
This is the westernmost excavated building. It was only partially excavated, and is part of a larger structure. As all other buildings, several rooms surround a central courtyard. The rooms are 5.1m x 5m in area, and are accessed from the courtyard by a 0.9m wide opening.
This aerial view views the ruin from the west side. Its eastern wall, seen on the top side, borders with building II. The central courtyard (room 201) was only partially exposed, and is seen on the bottom left side. Other rooms on the north and west sides were not exposed.
Below – A view towards the east, focusing on room 200 (5m x 4.9m) with room 41 behind it. In this room several Roman coins (4th, 5th century AD) were found, as well as a lintel adorned with a Greek cross within a circle. A 19th century Ottoman period female’s burial place was also found in the fill above the entrance.
The entrance to the inner room 41 has two pairs of ashlar-built engaged pilasters in the eastern wall (as well as the missing western wall). The room has a remarkable function, probably serving as the lobby for building I. Its stepped opening towards the inner room is 0.9m, and has additional 0.9m openings also to the north (left) and south (right).
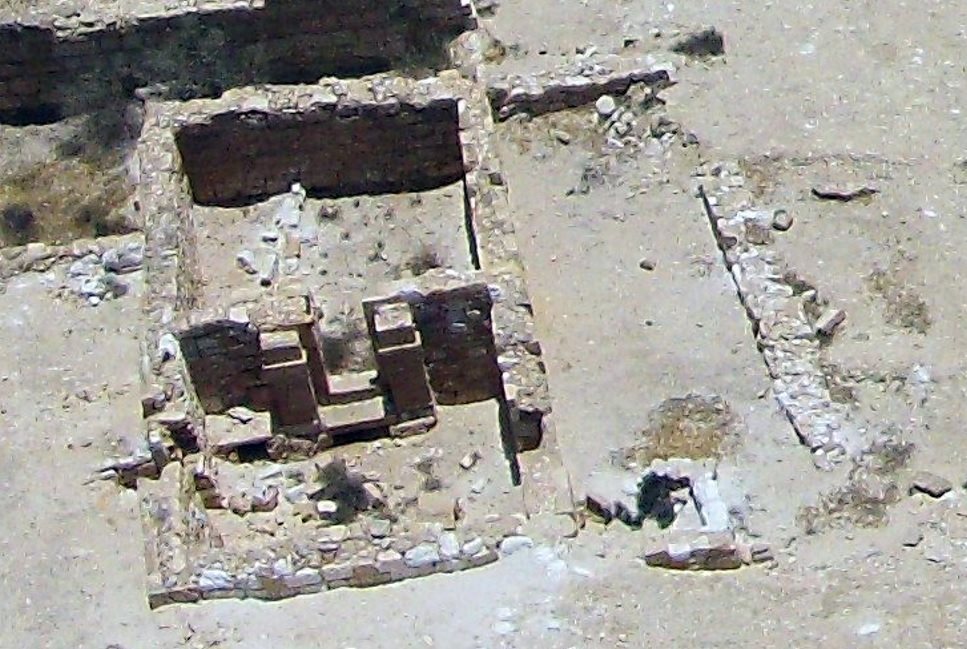
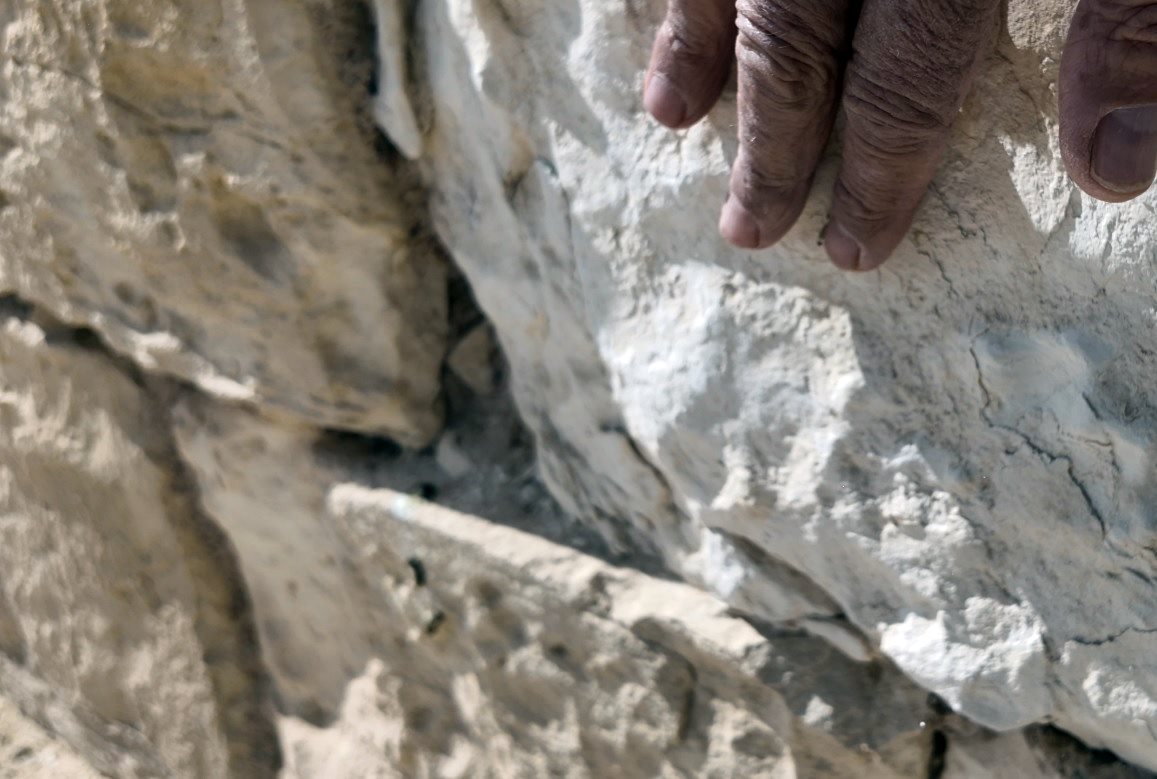
Room 200 is the best preserved of the area’s building method: outer walls are made of refined ashlars, while the inner walls are made of partially dressed stones. The floor of the room, as well as the courtyard, is made of packed earth. Wedge-shaped stones on top of the wall were used to support the ceiling. The stones were laid in leveled courses of uniform height, using small fieldstones and mortar (as in the illustration below).
- Building II
This building, east of building I, consists of a central courtyard, with 3 adjoining wings. A stepped entrance to the courtyard is on the west side and on the south side.
Roman/Byzantine coins were found during the excavations (rooms 20, 21, 25, 26, 31), dating the occupancy to the 4th-6th century AD. One of the ostraca were discovered at the site of Building II. A decorated cornice was also found (room 20), as well as a colonette and capital (room 21), and a fragmented lintel (room 24).
Bedouines used one of the rooms (room 20) for burial in later periods.
A view of one of the rooms of building II. The arches were added at a later time in 2016, but at the visit of 2026 they were gone.
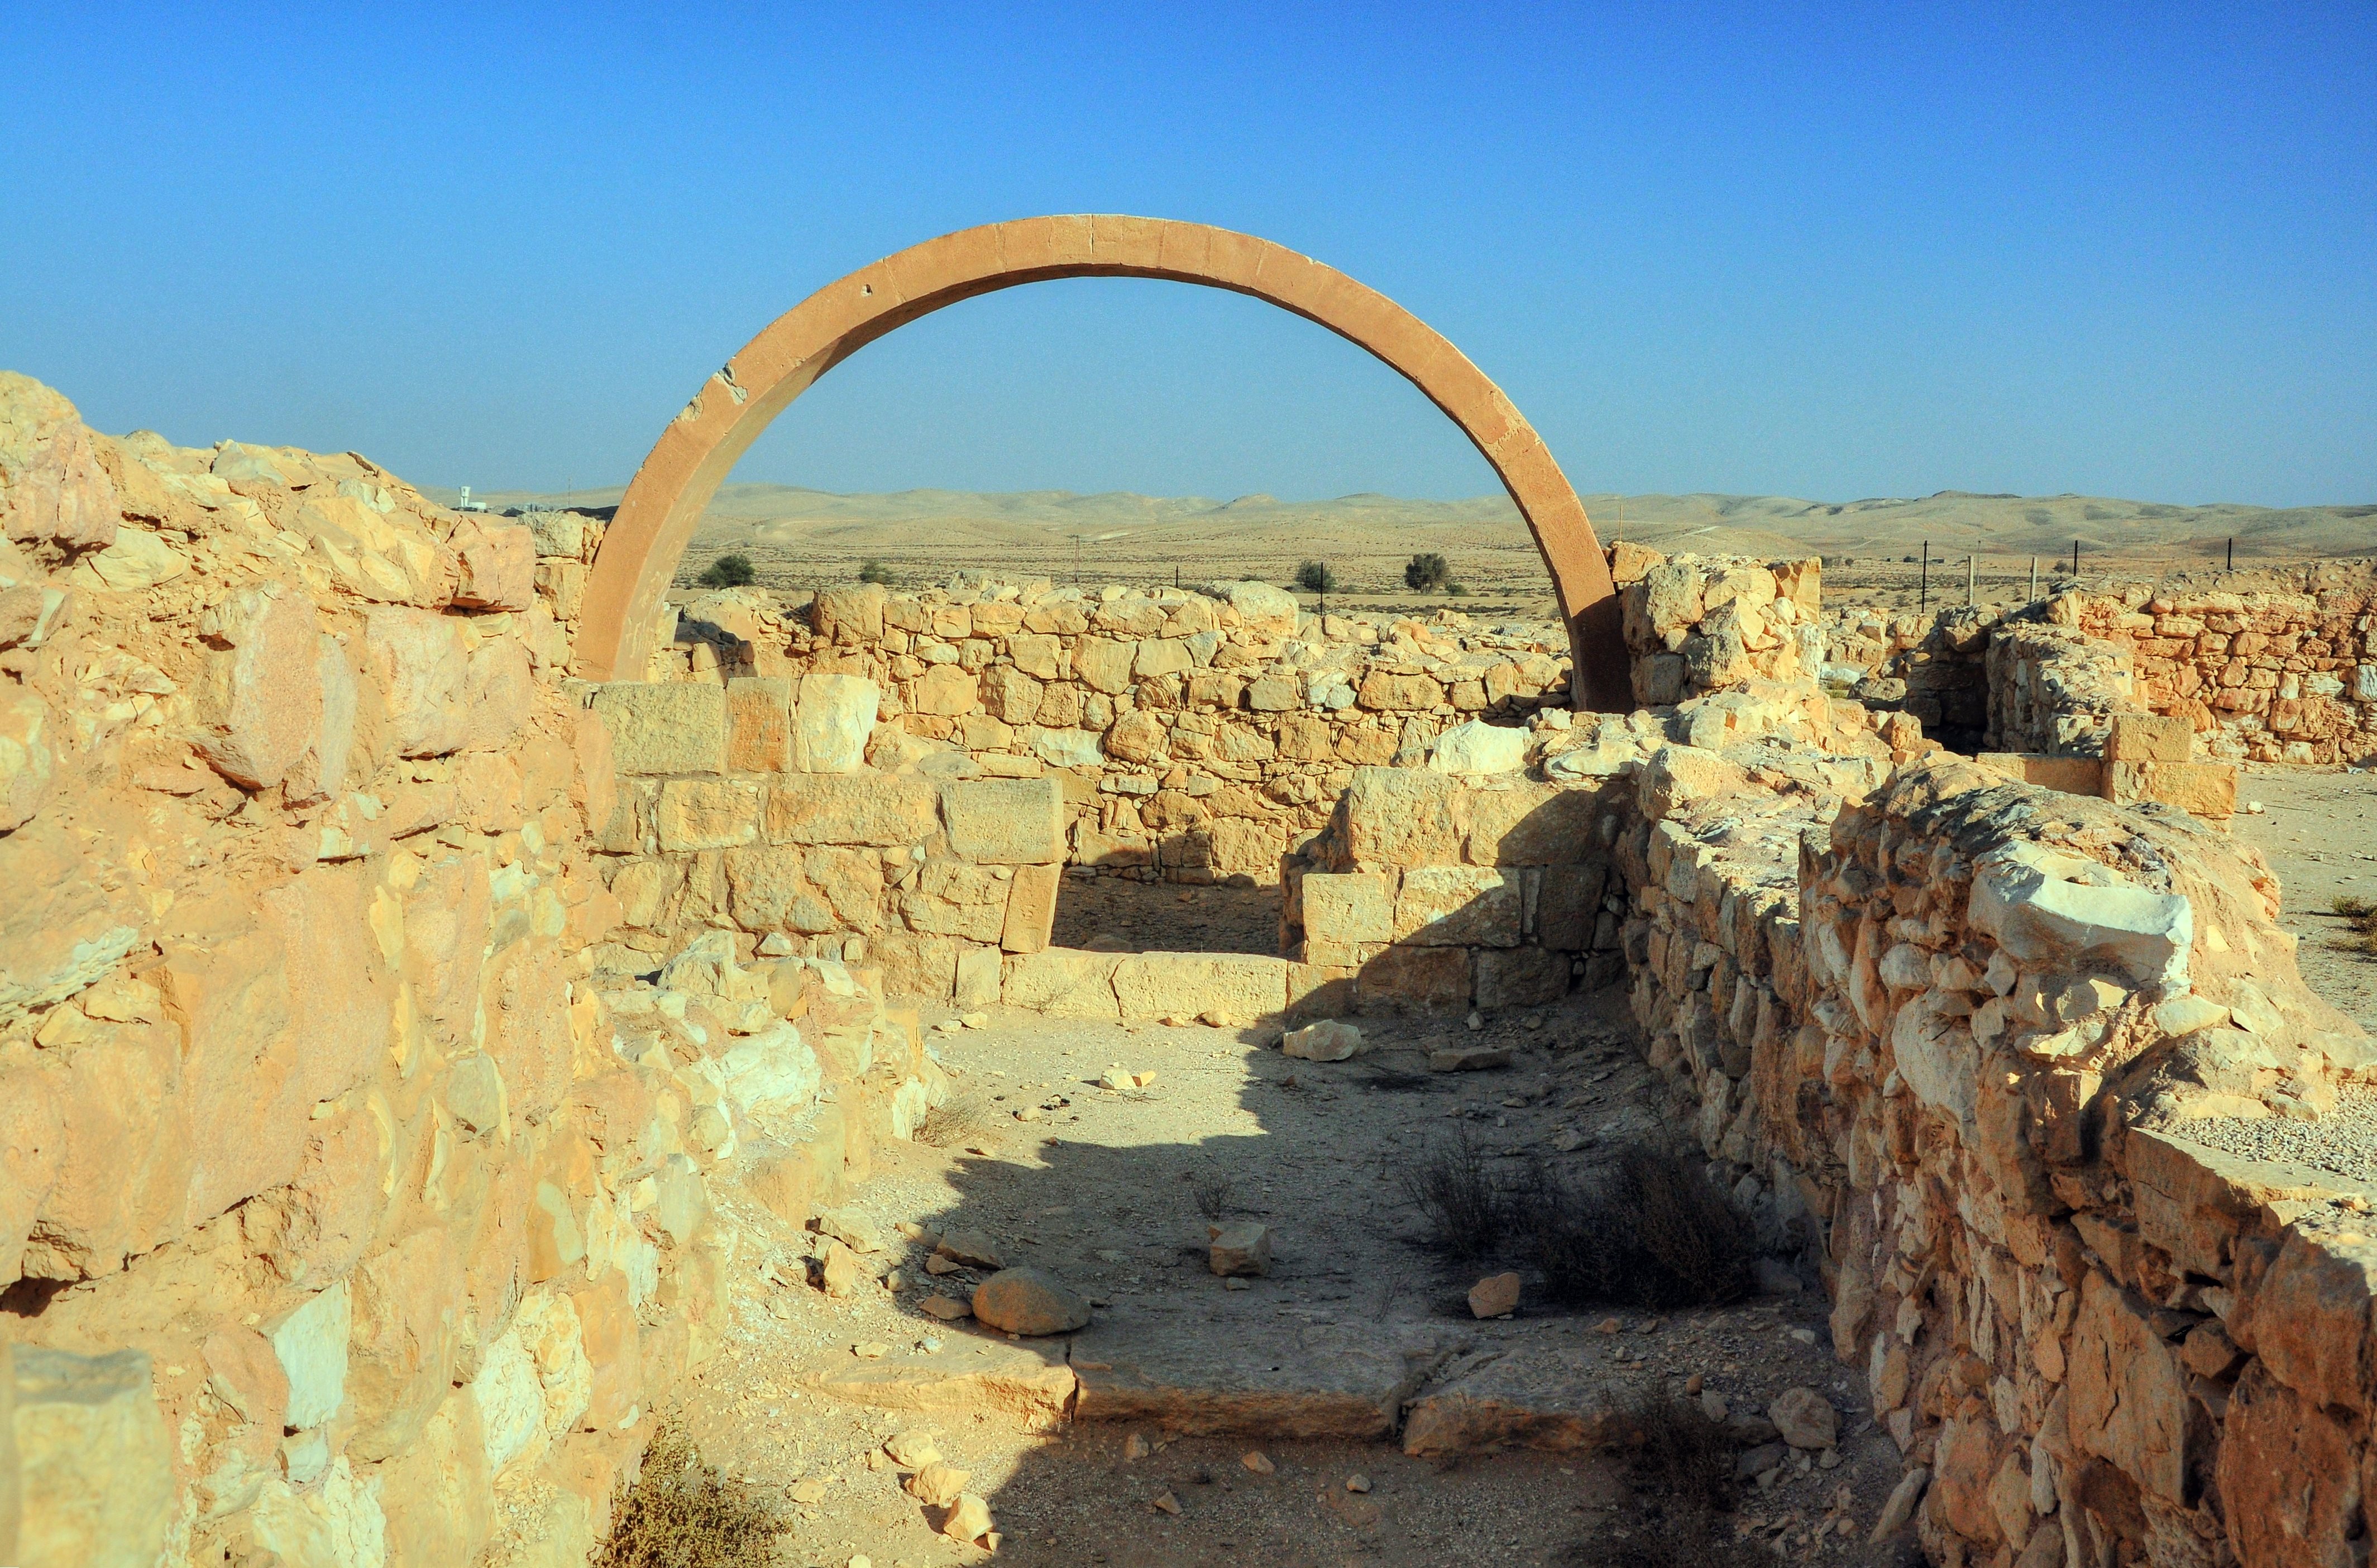
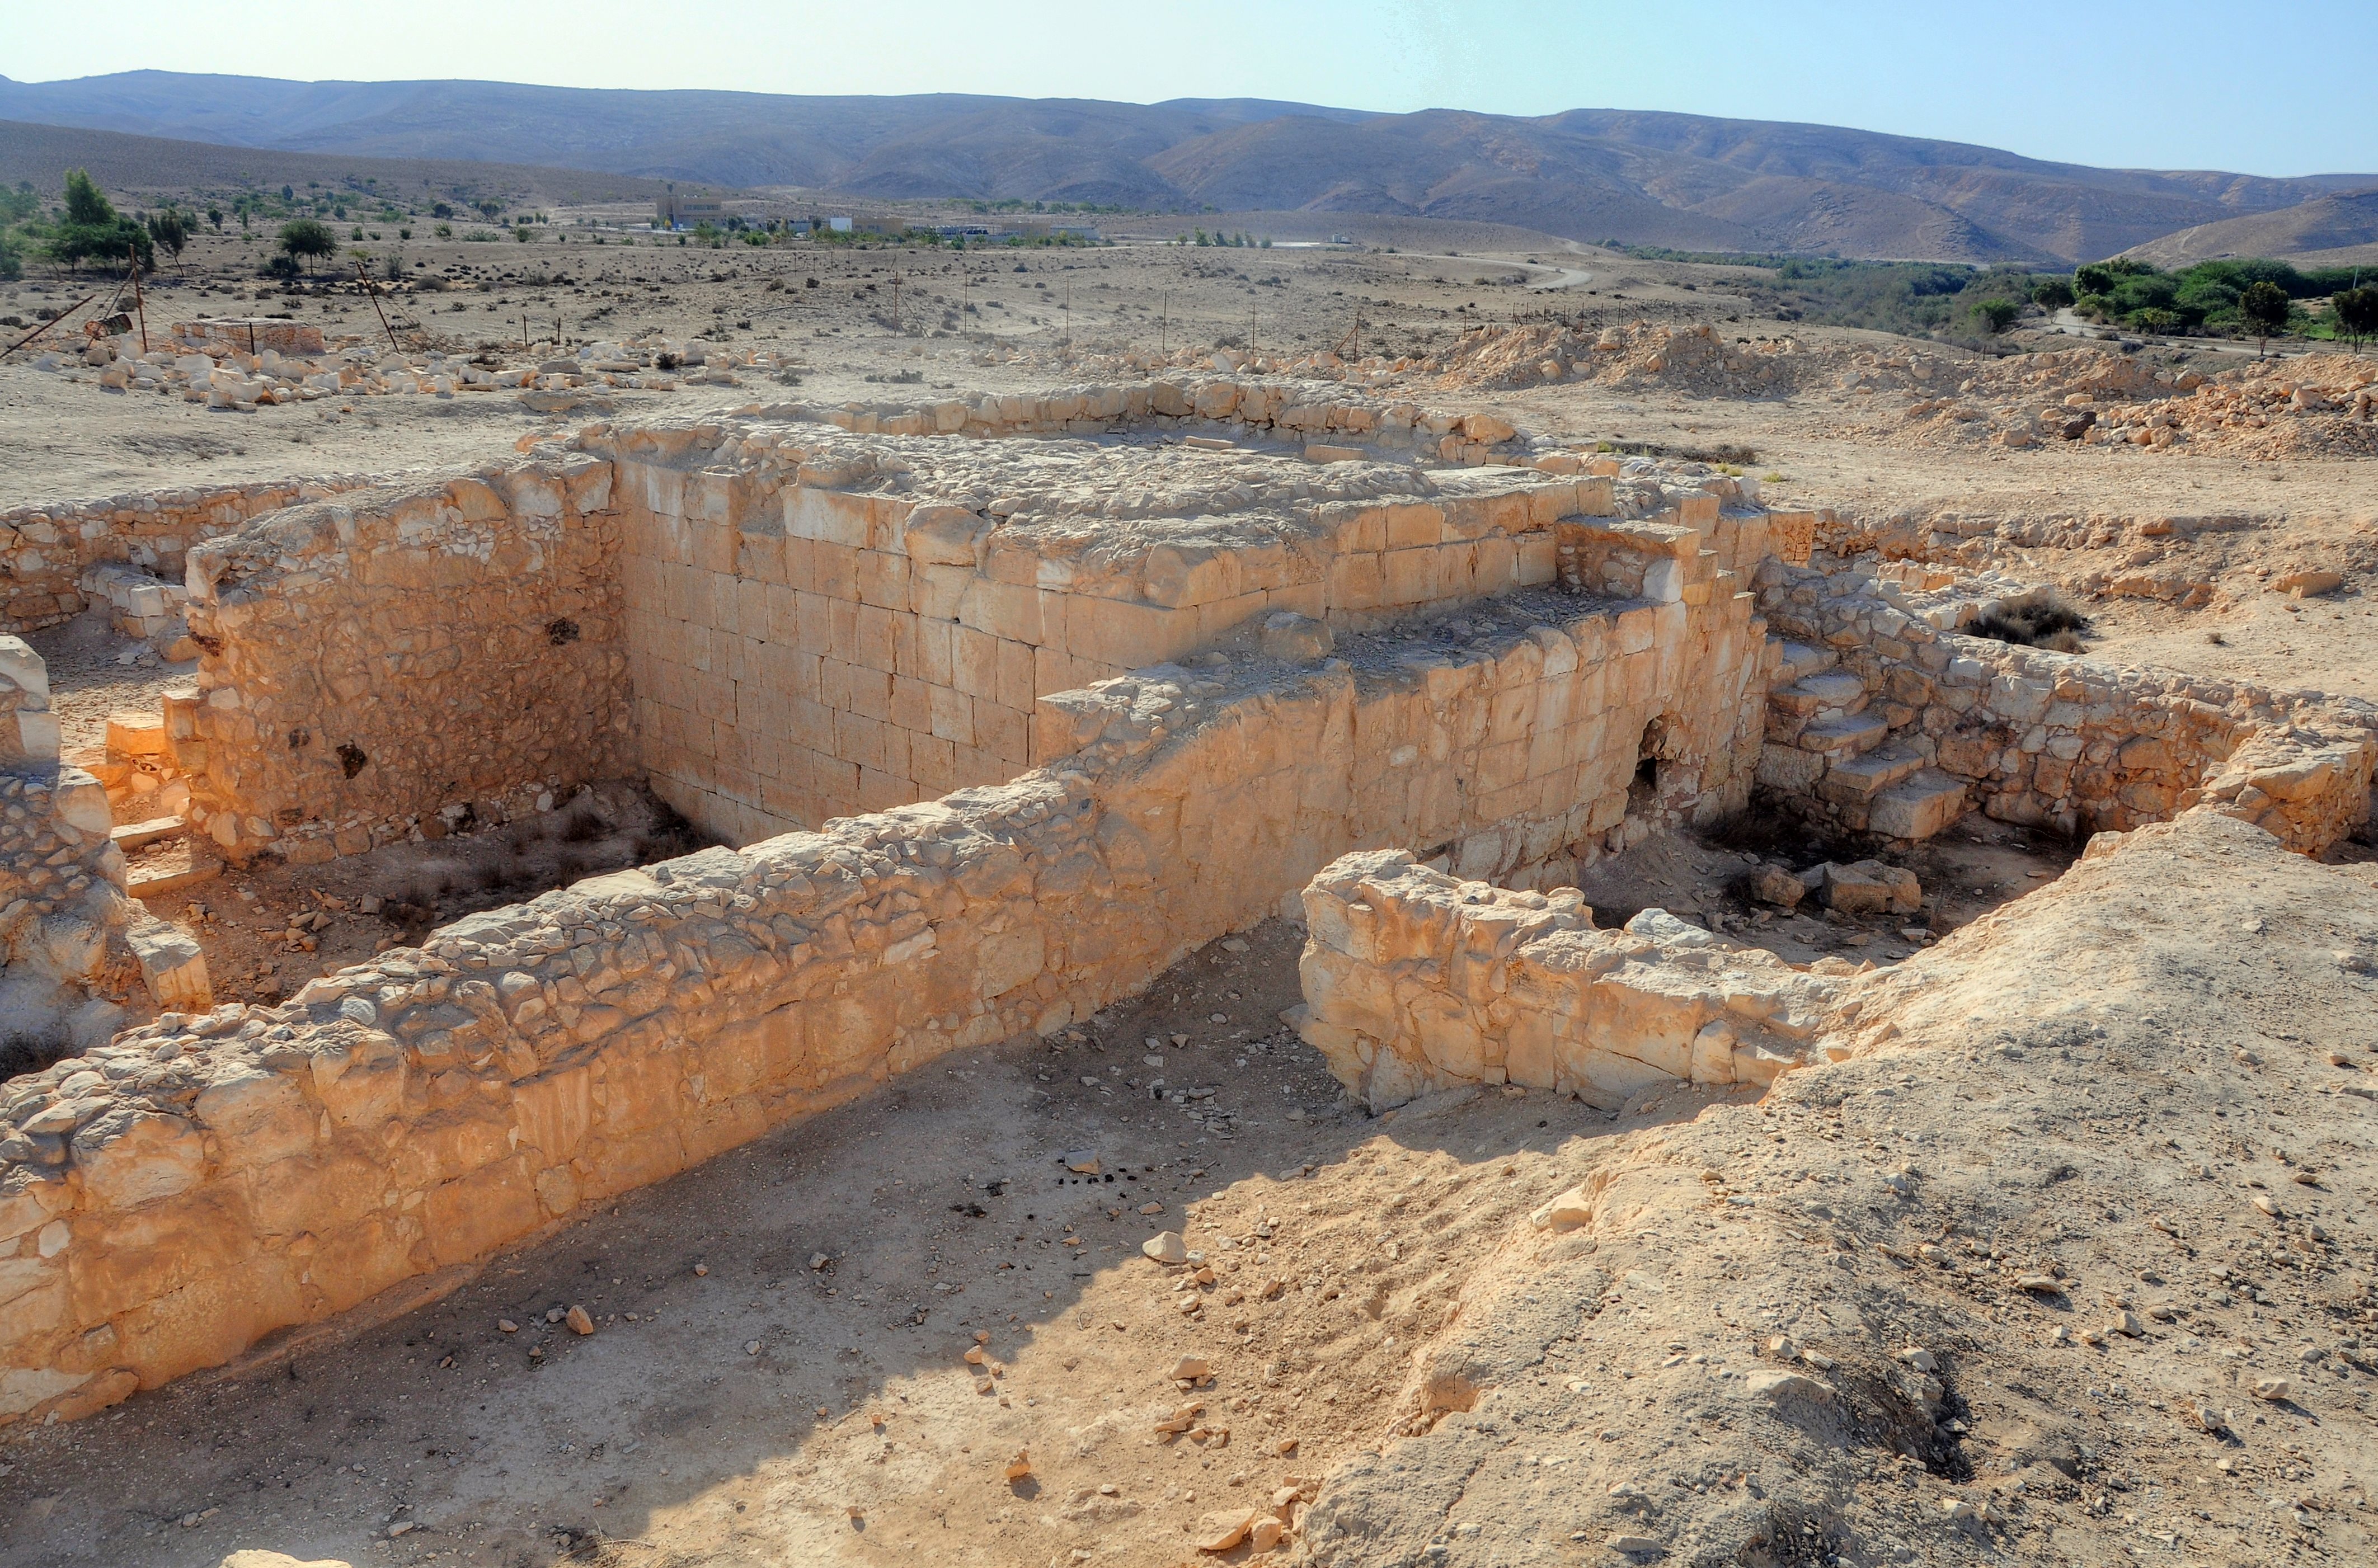
- Building III
This building is in the middle of the complex. It shares the same plan as the other buildings – a central courtyard with adjoining rooms.
The building is damaged on its south side, and this wing may have been actually part of building V. Furthermore, the wall on the east side is breached.
Entrance to the building is from an alley (room 44) shared with building II. This alley is 18.5m long and 3m wide. A channel on the northern wall conveyed rain water along the alley towards the west.
One of the ostraca were discovered in room 51. In one of the rooms (80) several late Byzanine coins (6th century AD) were found, implying a late occupation.
An arch was added above room 51 of building III. This view is towards the east.
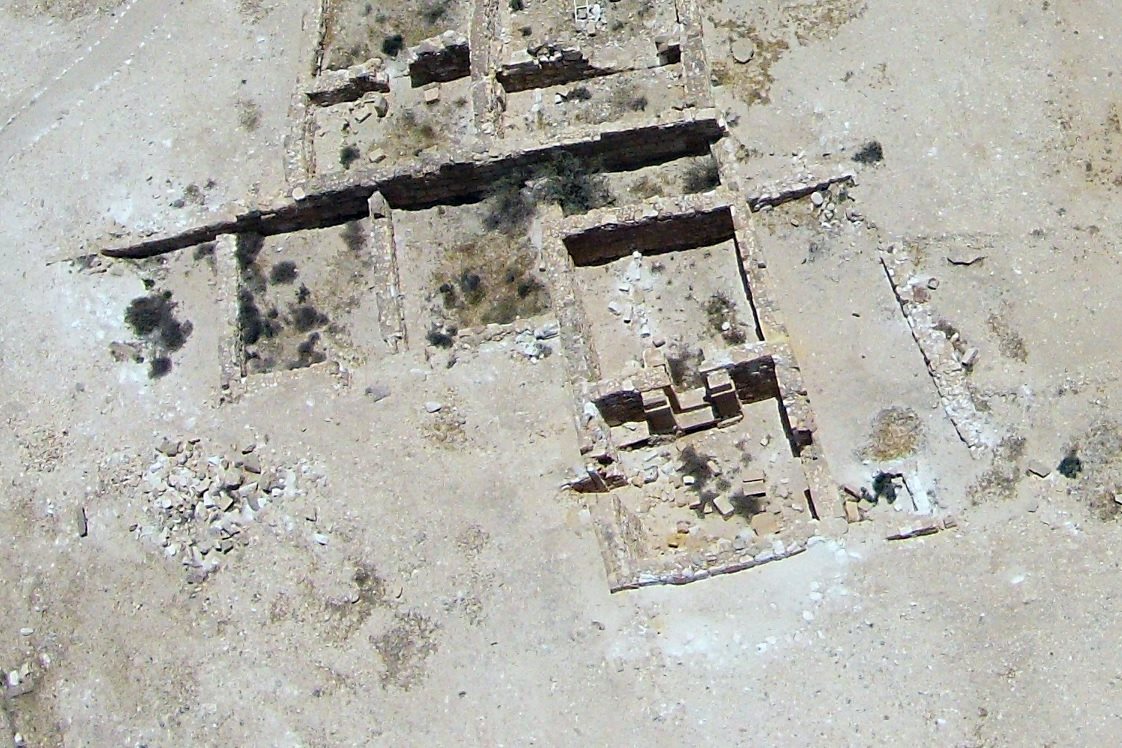
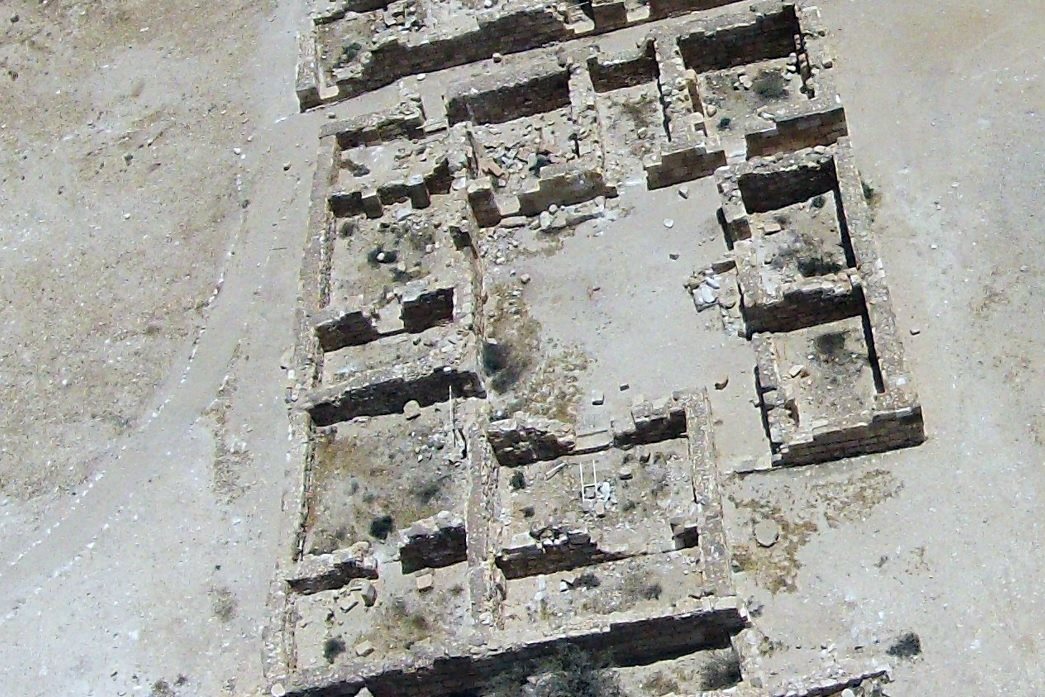
- Building IV
This is the easternmost building and the largest structure. The central courtyard area is 15.75 x 8m, surrounded by 16 rooms in its four wings. Access to all rooms are thru the courtyard (room 58). The building has entrances on the north (via room 46) and west (via room 82).
A decorated lintel was found (room 60) with a Maltese cross set within a medallion, as well as pilasters (rectangular columns, projecting from wall) in rooms 47, 54, 60 and 64.
This is an aerial view (captured 2016) of building IV, looking to the east. The large courtyard is room 58.
- Building V
This building is the southmost structure in area B, and is the worst preserved.
The alley separating buildings II and III may have continued to the building (along the northern rooms). A previous level of structures dated to the Nabatean/Roman period has been unearthed under the southern rooms (97/98).
A decorated lintel was found (courtyard room 96) with a Maltese cross flanked by palm branches. At the entrance from the courtyard to room 95 was a lintel adorned with a Greek cross within a circle.
This is an aerial view of the building, as captured in 2016 towards the south. The large area is the central courtyard (room 96). On the bottom left side is room 104, that is seen in the next photo.
This is a view of the northmost room (104), looking towards the north. The alley separating buildings II (far left) and III (far right) is seen between them.
Another view towards the north, as seen from building V, shows its eastern rooms 95 (left) and 108 (right). In the background are buildings III (far middle) and II (far left).
- Building VI
This building is located on the west side of the complex. The core structure was a watchtower (room 500), surrounded by rooms on all sides. The building also includes, on its western edge, a stable with 3 troughs in the dividing wall of the two rooms (502, 506).
Roman/Byzantine coins were found during the excavations (room 45). An ostraca was discovered in room 501. Pottery sherds were dated to the 1st/2nd to 6th/7th century AD.
The watch tower is 7.2 x 6.2m on the exterior, and 4.2m x 4m on the interior. Its walls are 2.3-2.9m wide. It was built in the 1st/2nd century AD, preceding the other buildings in this area. A staircase on the east side provided access to the upper floor.
Entrances to the tower was from the stable and thru opening on the north east (rooms L2040, L2041).
The stable was entered from the external corner of the building (rooms 121 and 502).
During the 2016 visit the stable was in better condition. Here is a photo of one of the 2 troughs and the opening, as seen from room 506 towards room 502.
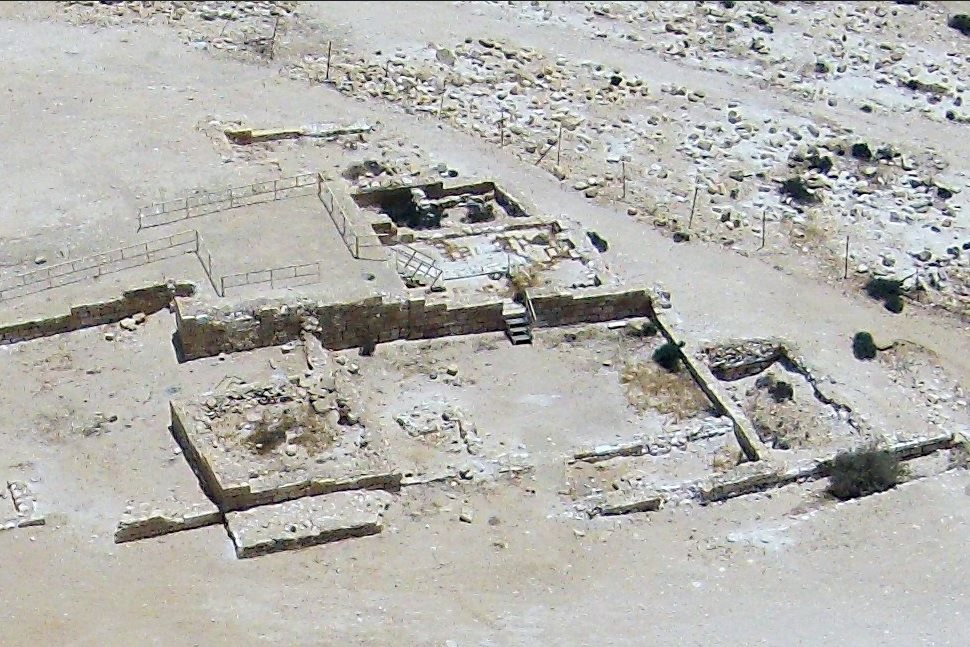
(b) Area A
This area is 60m northeast of area B, closer to the park of Lake Yeruham. It is seen here from area B. The building is a structure with 3 wings that surround a common courtyard. Within each wing were 3-6 rooms. The ruins cover an area of 800 square meters.
Roman/Byzantine coins were found during the excavations (rooms 11,13), with dates of the 2nd-4th century AD. The occupancy probably continued to the end of the Byzantine period, as other buildings in the Yerucham fortress area. Its ruin may have been the effect of an earthquake, as walls were found toppled.
(i) Hike
![]() A hike to Area B, conducted on February 23, 2026, was recorded in a video.
A hike to Area B, conducted on February 23, 2026, was recorded in a video.
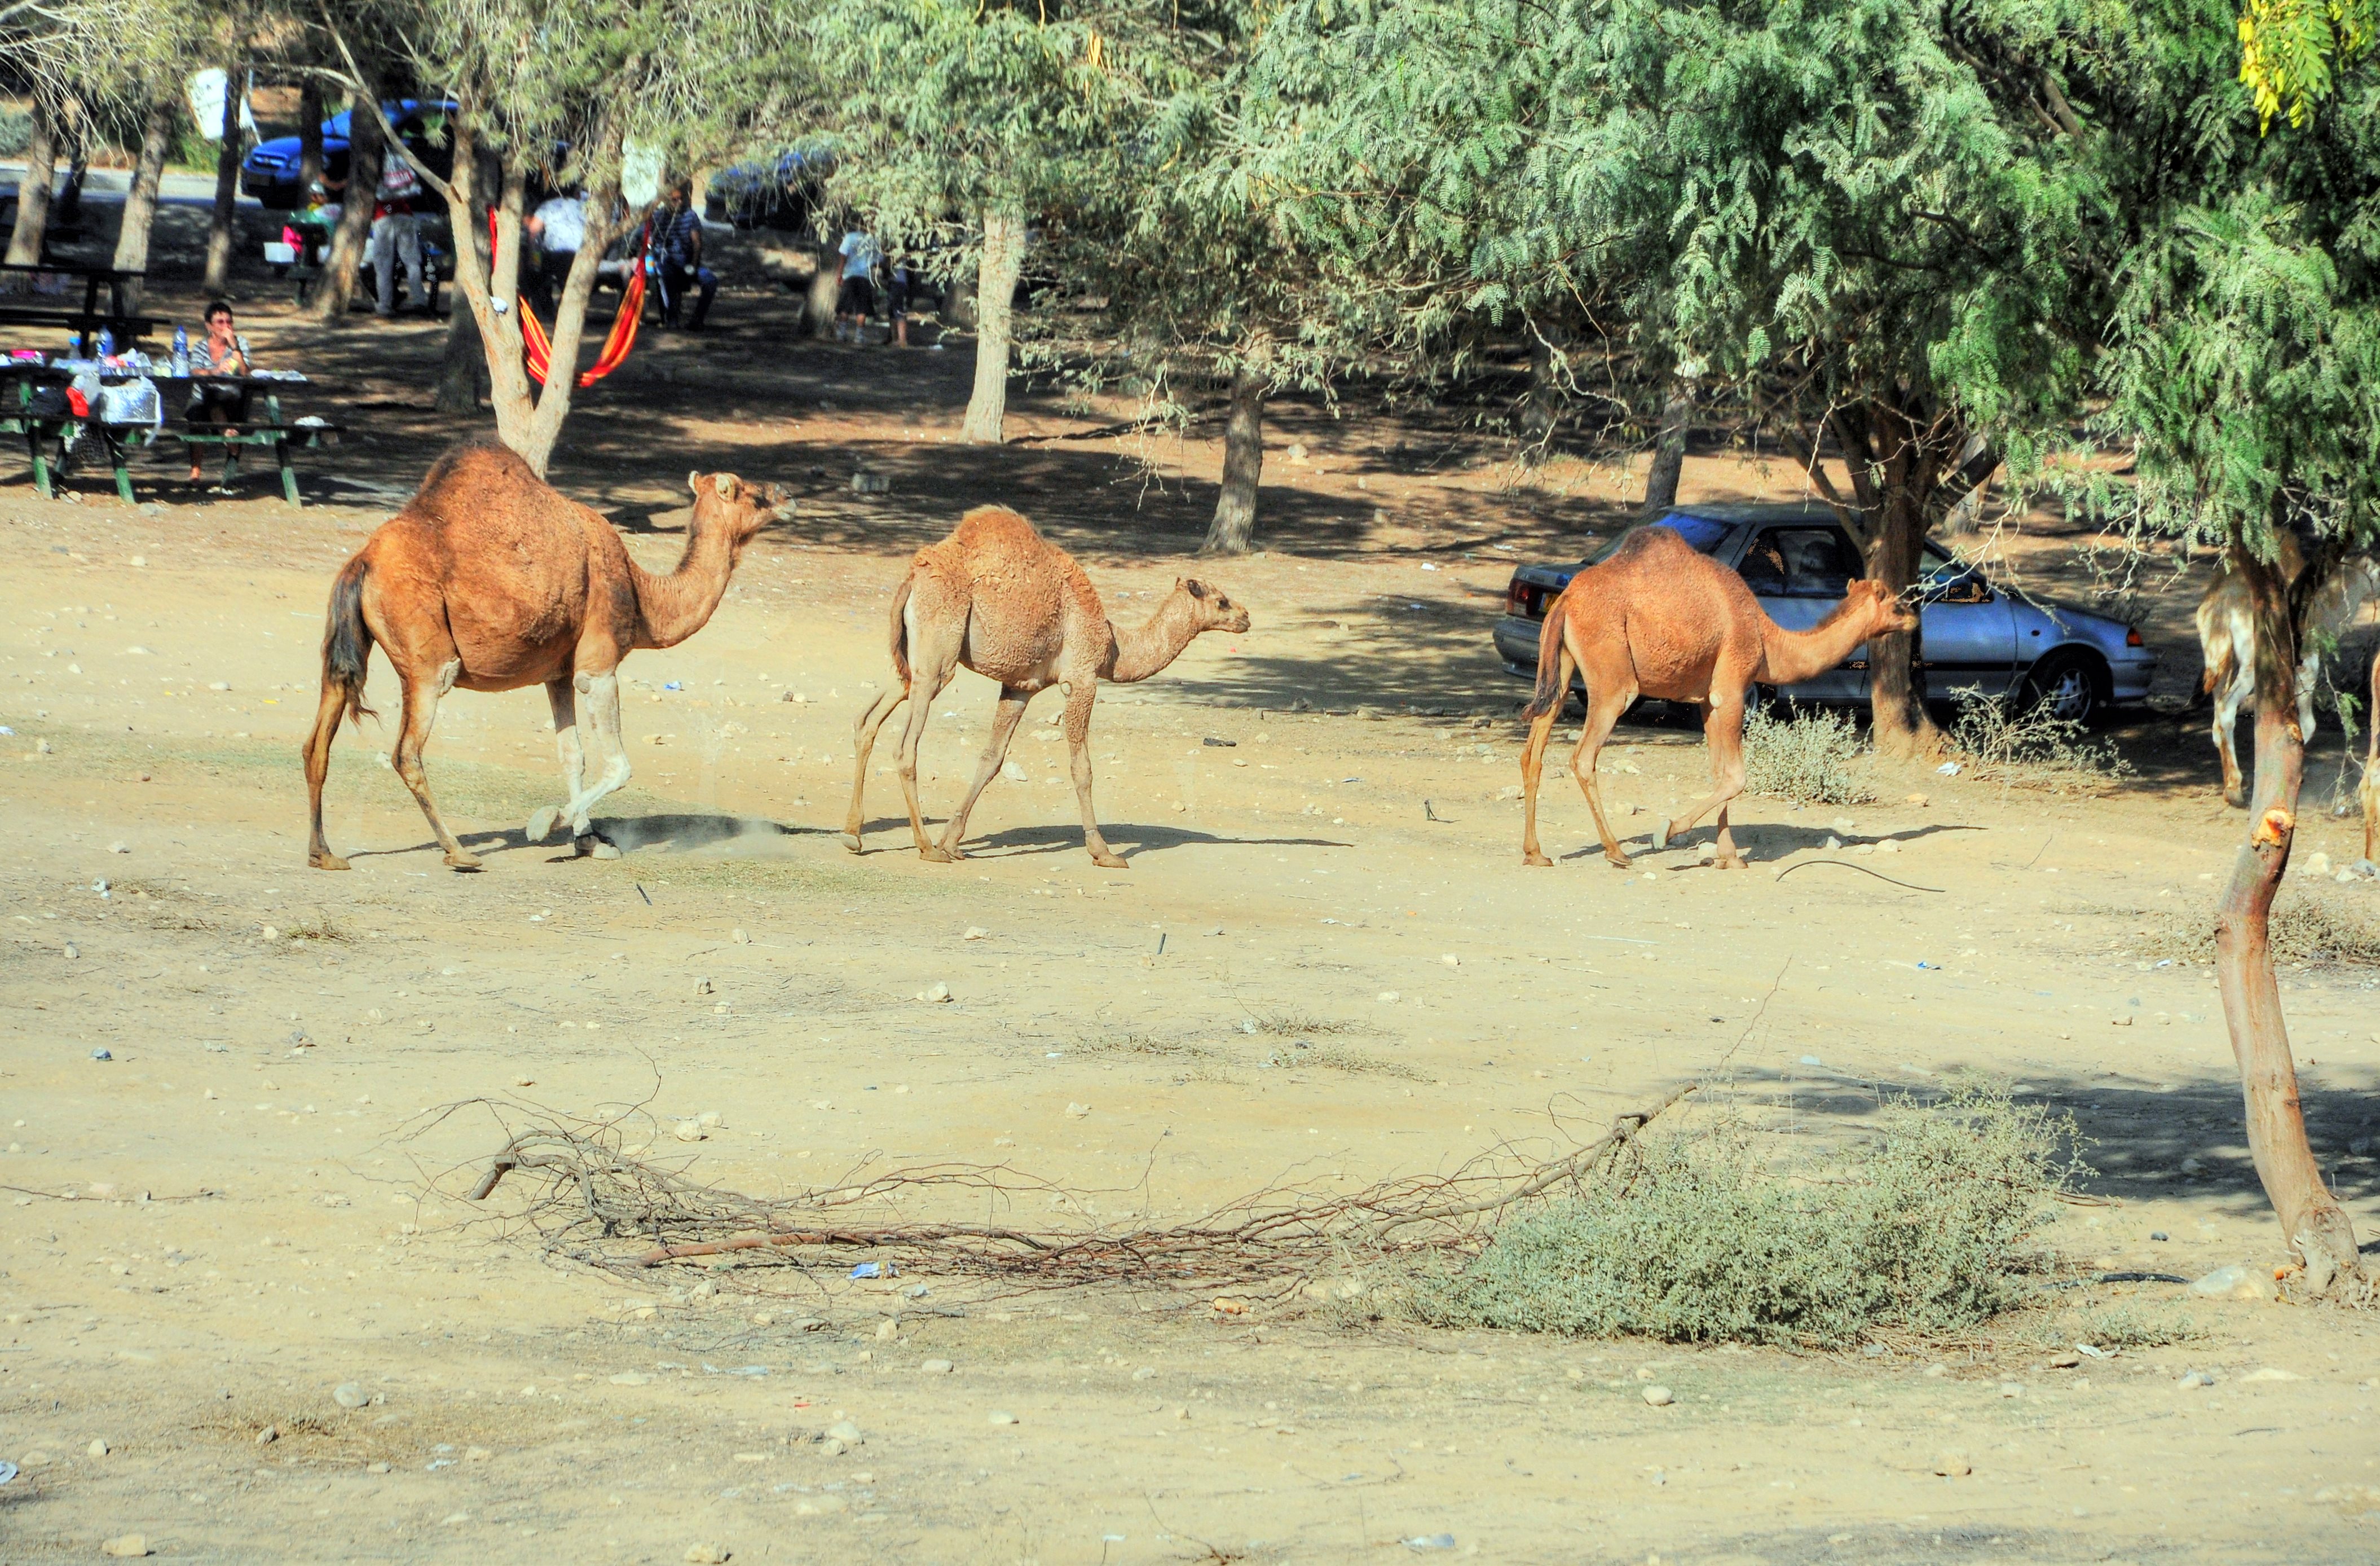
(j) Yeruham Lake Park
The lake of Yeruham is located on the west side of the site. It was constructed in 1953, initially as a reservoir that supplied agriculture water, then was incorporated into a regional park. The area of the lake is 150 Dunam (15 hectares), and the park area is 500 dunam (50 hectares). Across the vast park are walking trails, picnic tables, playgrounds and open public areas.
Etymology (behind the name):
* Names of the area:
- Yeruham – the town was established in 1951. The name is derived from the Hebrew root R-H-M (ר-ח-ם), means “mercy,” “compassion,” or “to cherish.” Before the modern town was founded, the area was known by the Arabic name Bir Rakhma, meaning “Well of Mercy.” It is located north east of the Lake’s park area. Local tradition identifies this ancient well as the one revealed by God to Hagar when she was wandering in the desert with her son Ishmael (Genesis 21)
- Tel Yeruham – – an Iron Age site on the west side of the town.
- Khirbet A-Rakhma – Arab name of Tel Yeruham, an ancient mound north of Yeruham. In Arabic: the ruins of mercy.
- Qasr Rekhmeh – the Arabic name of the site (means: fortress of mercy)
Links and References:
* External links:
- Archaeological survey of Israel – archaeological reports on map 164 (Nahal Revivim), sites 123, 138, 139, 140
- “Meẓad Yeruḥam Site: A Roman- and Byzantine-Period Rural Settlement in the Negev Highlands” (in Hebrew) – Qadmoniot 153 (2017), pages 43–47, N. Benenstein, I. Taxel, and O. Tal
-
Mezad Yeroham A Caravanserai site of the Roman and Byzantine periods in the negev Highlands Zaphon –By Nicolas Benenstein (2025, 84 pages)
* Internal links:
- Har Yeruham – prehistoric sites on the hill south of the lake
- The Nabateans – info page
- Map of Nabatean sites in Israel
![]()
BibleWalks.com – On the footsteps of the early man in ancient Levant
Har Yeruham <—previous Negev site—<<<All Sites>>>—next Negev site —> Moa
This page was last updated on Mar 2, 2026 (add hike video)
Sponsored links: